Add a Job

Naviate Cloud Manager — Job Definition Panel in Add Mode
Please Note — A Network Server definition representing the machine on which Naviate Cloud Manager is installed must first be created before a Job may be entered. Please refer to the Prerequisites section above, for more information.
To add a new scheduled Job, the first step is to navigate to the Jobs screen and press the Add a new Job ![]() button.
button.
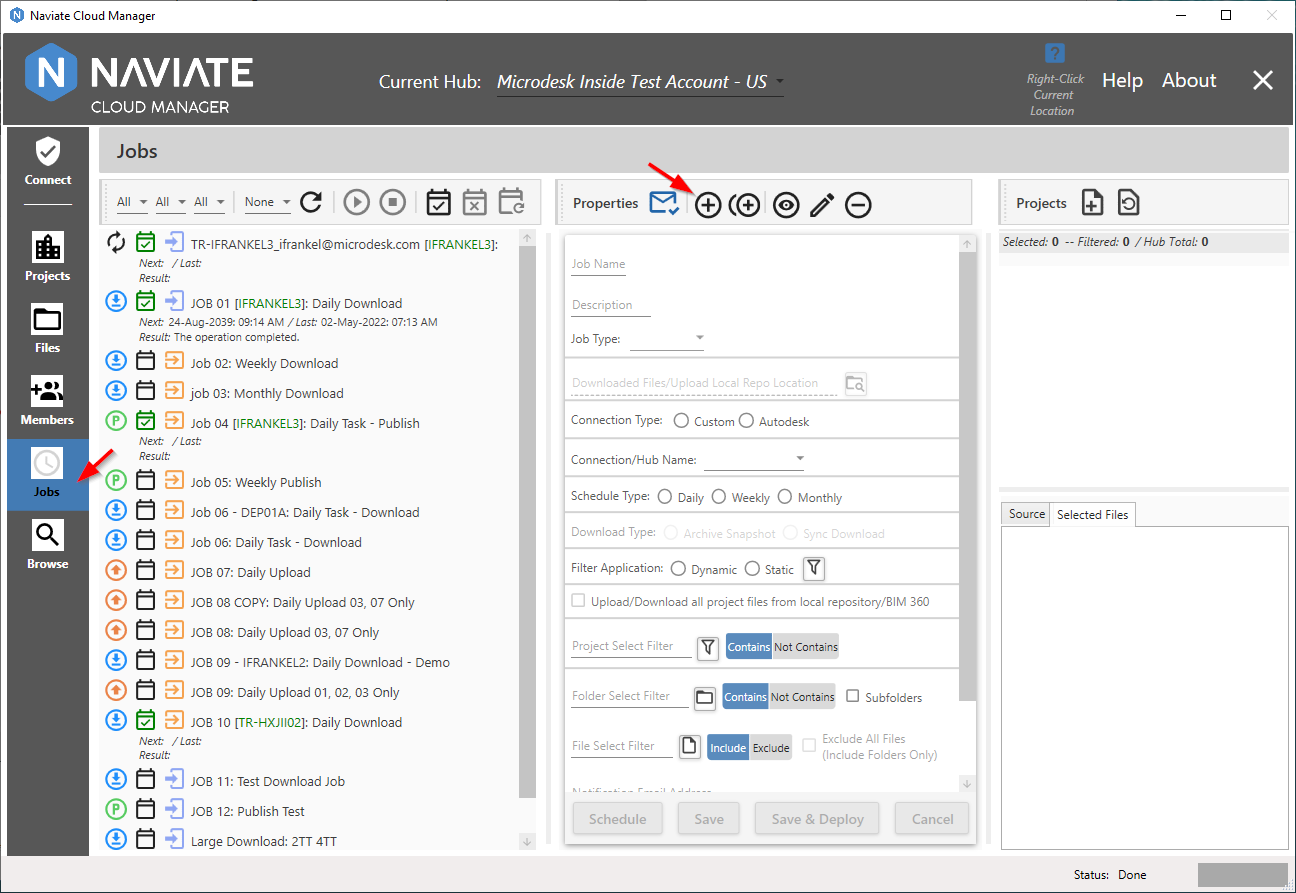
The Add a new Job ![]() button is located in between the ‘Email Configuration’ and ‘Copy a Job’ buttons in the center panel. It is not to be confused with the Add Job as a scheduled task
button is located in between the ‘Email Configuration’ and ‘Copy a Job’ buttons in the center panel. It is not to be confused with the Add Job as a scheduled task ![]() button, located on the left panel.
button, located on the left panel.
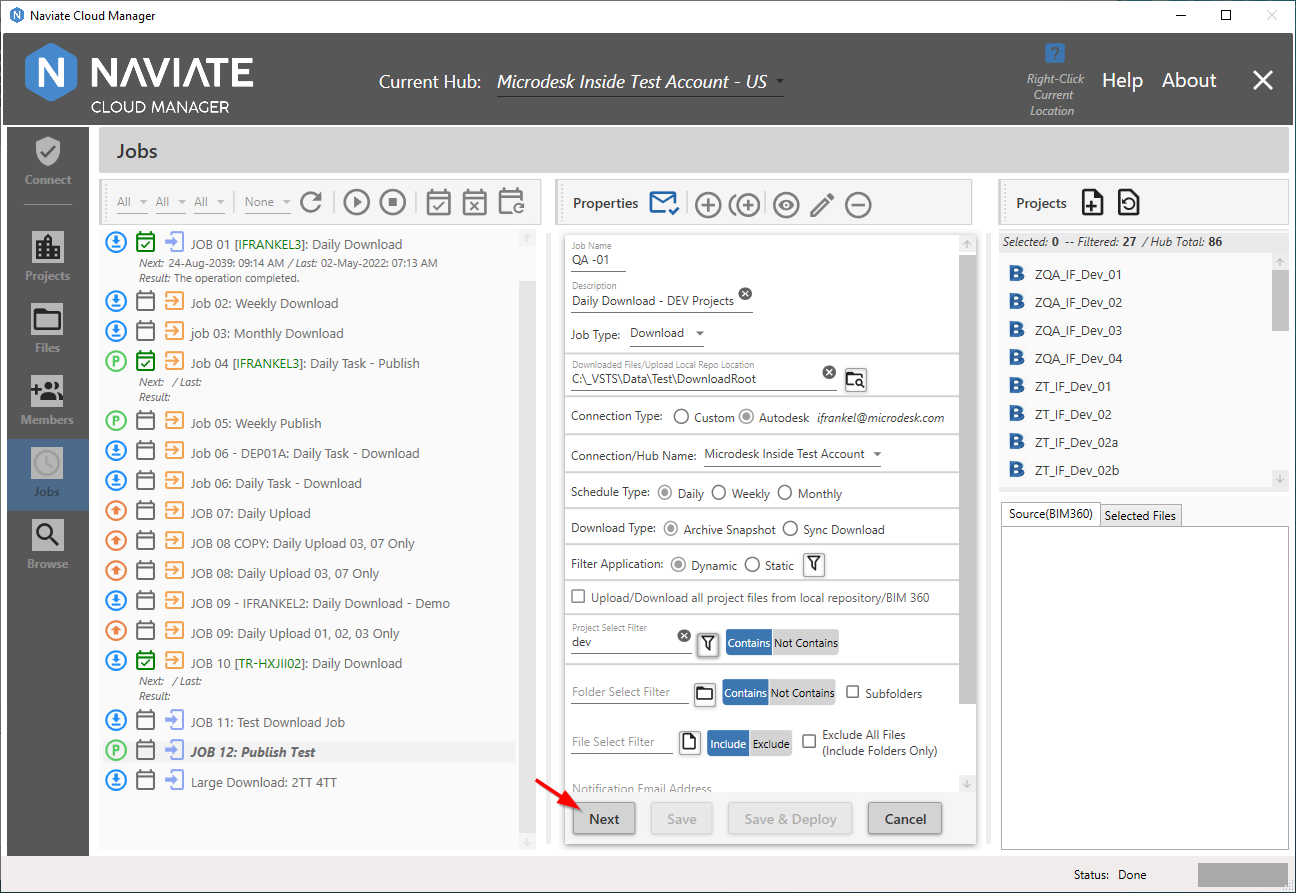
Once in add mode, the Job definition fields are ready to be filled in. Adding (or editing) a Job consists of performing data entry in two different screens. The first screen, shown below, contains the general Job information. Once this screen is complete, pressing the ![]() button takes the user to one of three different screens, according to which of the three Schedule Types is selected.
button takes the user to one of three different screens, according to which of the three Schedule Types is selected.
According to the Schedule Type selected (Daily, Weekly or Monthly), the data must be completed and accepted. For more information, please refer to the Schedule section, below.
On successful completion and acceptance of the Schedule screen, control is returned back to the main Job Definition screen.
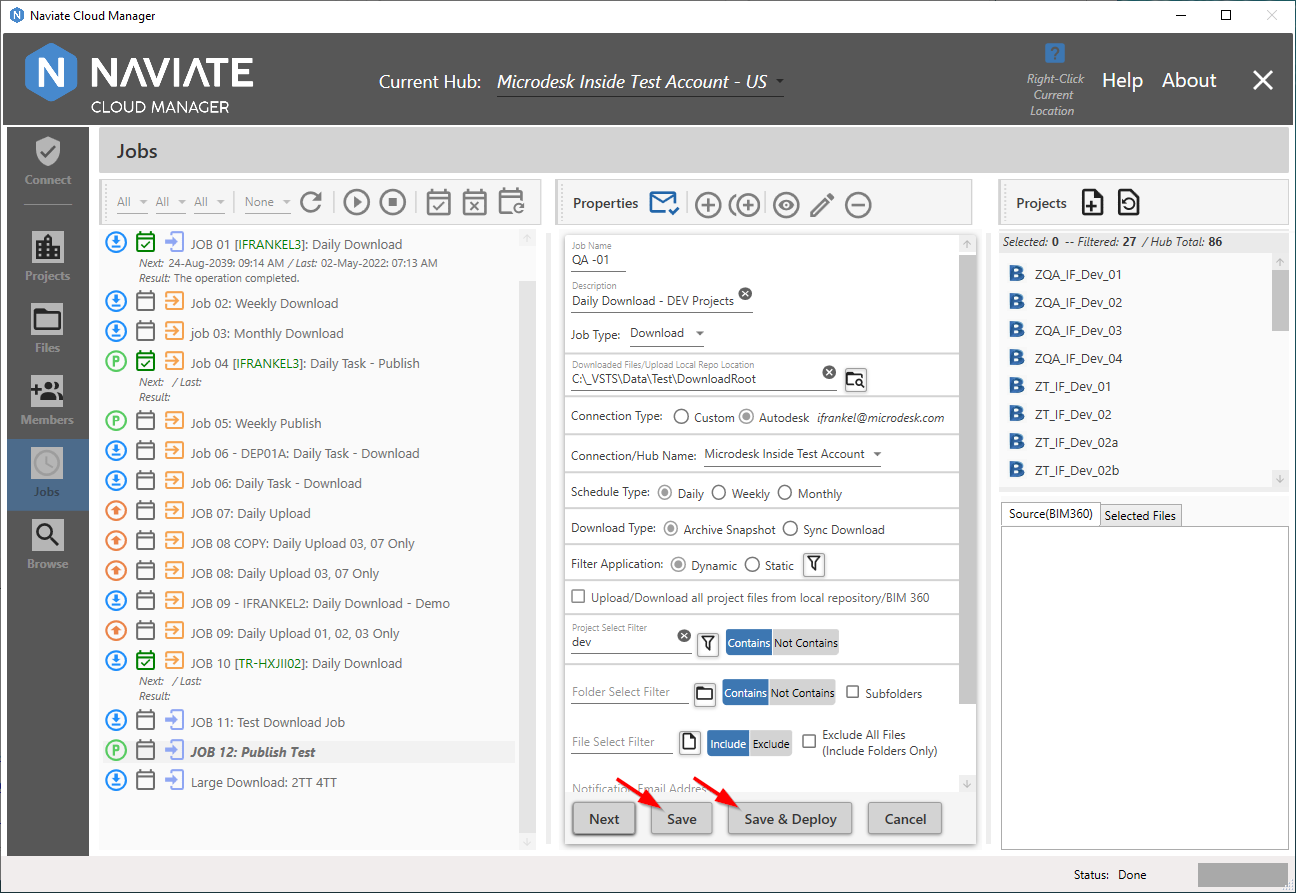
Now, all that remains is for the user to Save the newly created Job. Optionally, they can also choose to Save & Deploy. The Save & Deploy button is the same as if the Job were first saved, then accessed from the Job Listing and Add Job as a Scheduled Task were selected.
- Job Name
- Description
- Job Type
- Download Files/Upload Repo Location
- Connection Type
- Connection/Hub Name
- Schedule Type
- Download Type
- Filter Application
- Upload/Download Entire Project from Local Repository/BIM 360
- Project Select Filter
- Folder Select Filter
- File Select Filter
- Notification Email Address
- Notification CC Email Address
- Deployed to Machine
- Schedule
- Project/Files Selection/Viewer