Schedule
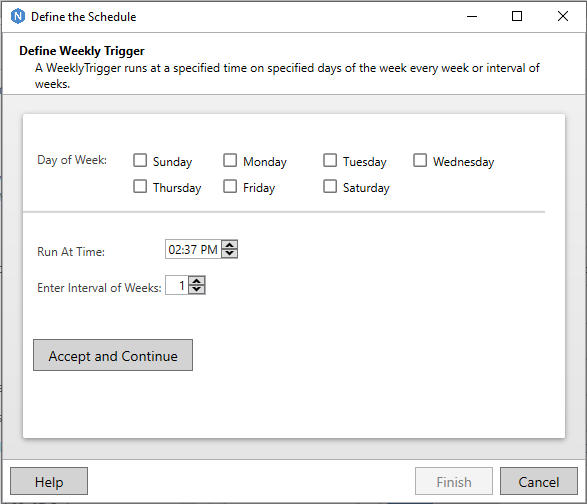
Naviate Cloud Manager — Job Definition — Weekly Schedule Window
Once the data has been completed on the main screen, the new Job is not yet ready to be saved. Before it can be saved, the schedule detail information must first be filled in.
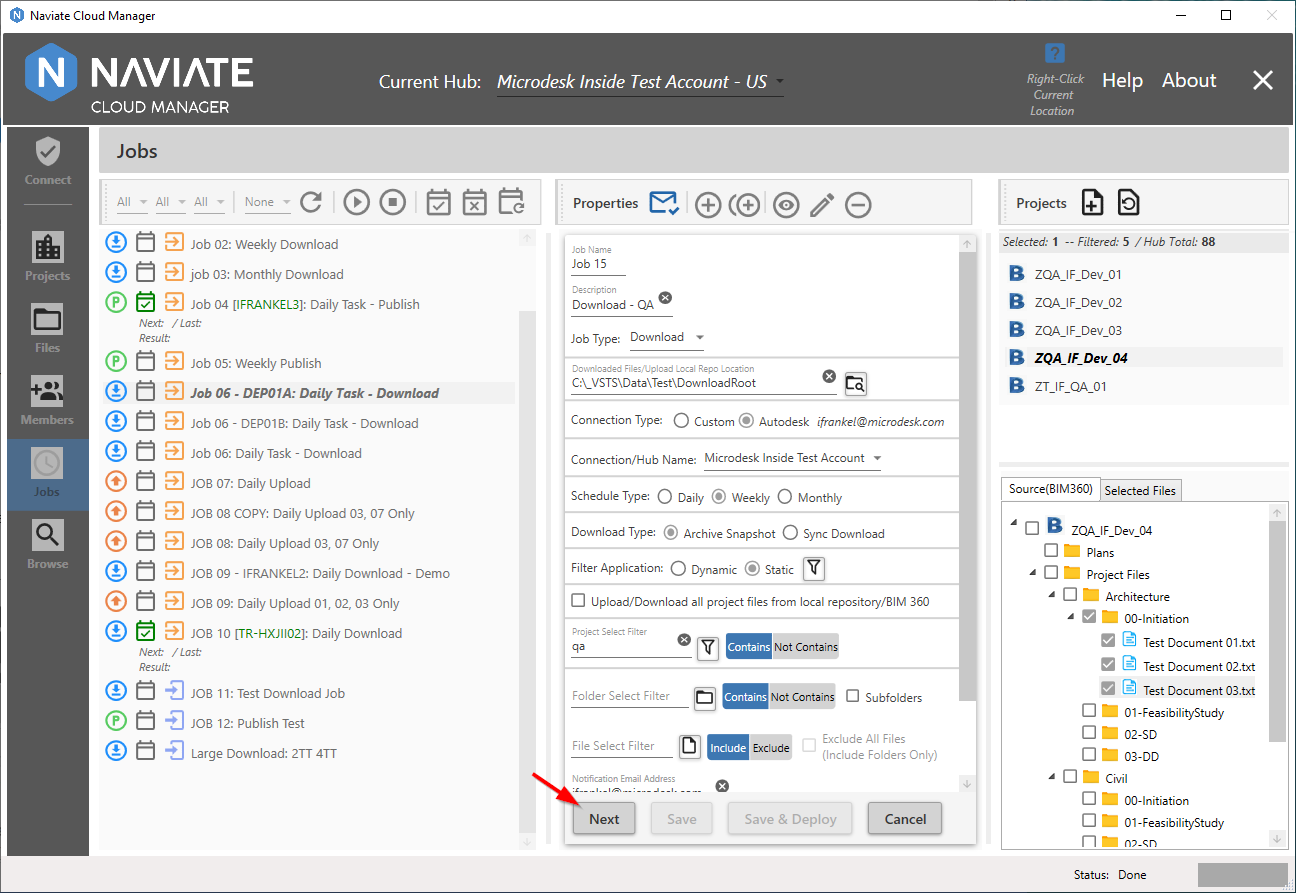
Since we are currently in Add mode, the two Save buttons (Save and Save & Deploy) are disabled. The only choices available are to either proceed to the schedule screen by pressing  or to press
  to discard all current entries on the screen.
Naviate Cloud Manager provides three different scheduling screens — one for each of the three different types of scheduling supported. Pressing the button navigates to the Schedule screen specifically designed for the selected Schedule Type.
Once the schedule screen has been completed, the user is returned back to the main Job data entry screen. As shown below, since the schedule has been successfully completed by pressing the schedule screen Finish button, the  and
and  buttons on the main Job screen are now available.
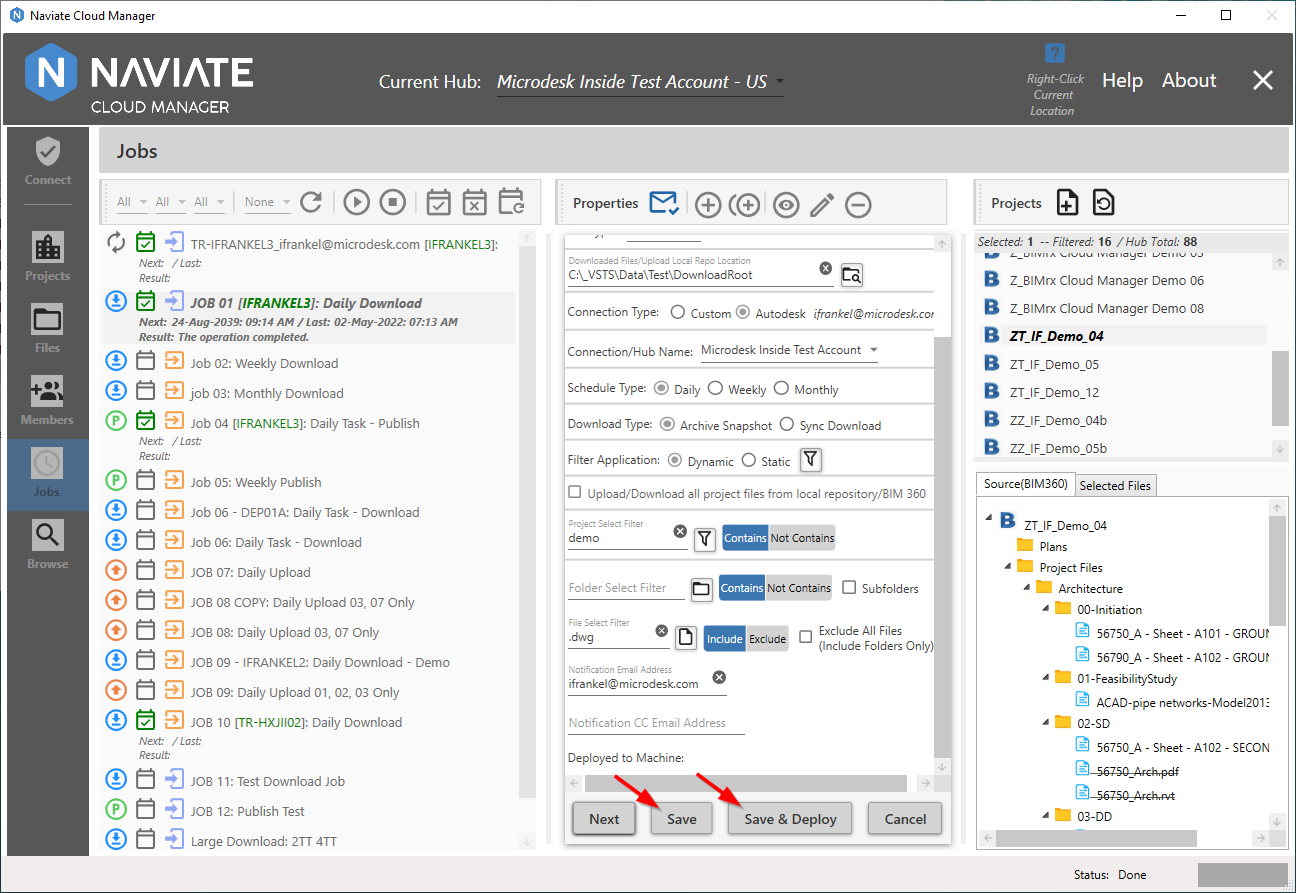
Pressing the ![]() button saves the new Job to the Naviate Cloud Manager database, where it is now stored and available for use. The
button saves the new Job to the Naviate Cloud Manager database, where it is now stored and available for use. The  button performs two tasks — it saves the Job and then immediately adds it as a scheduled task. This saves the user from having to perform each operation separately.