Daily Schedule
The top left portion of each scheduling screen contains the type of Schedule being defined along with a short description.
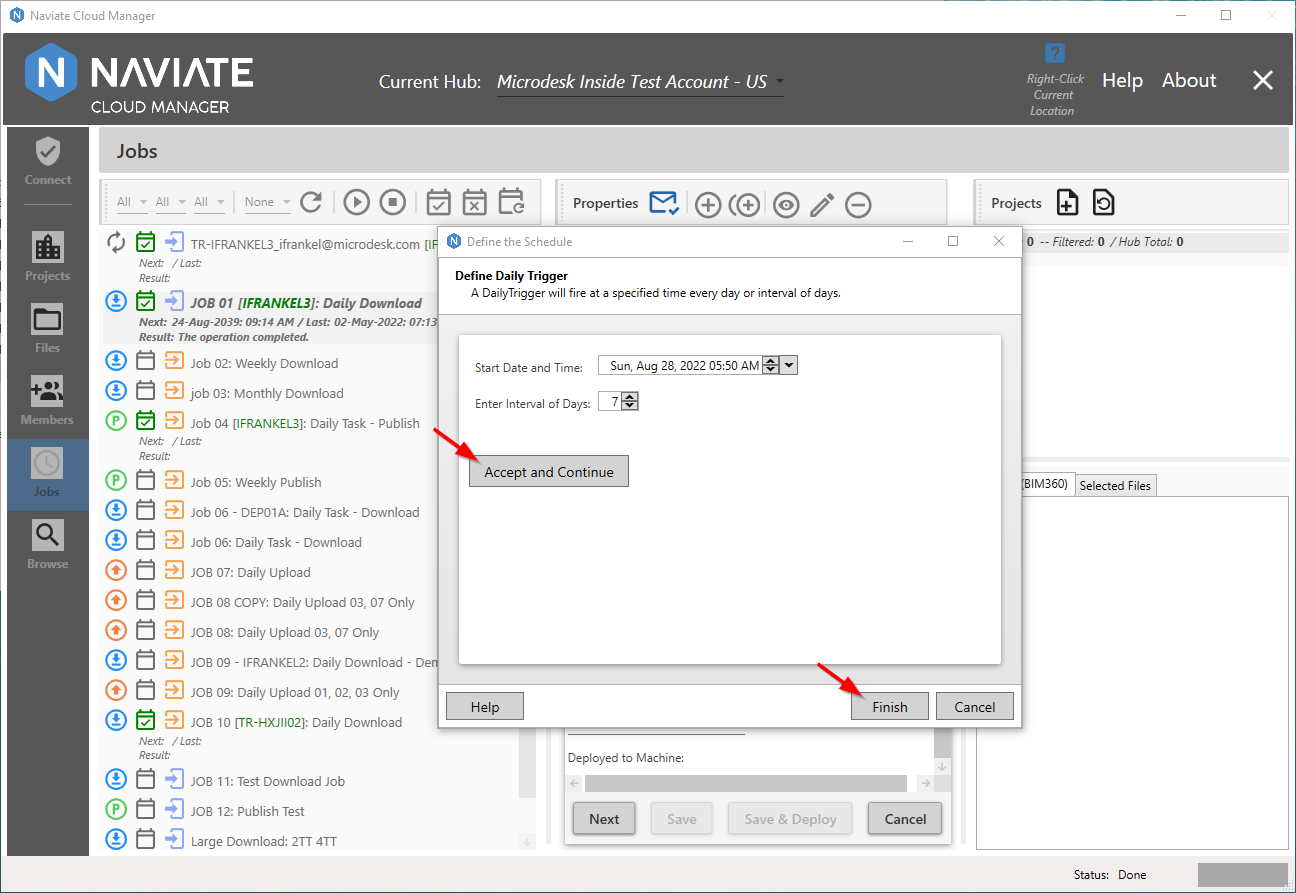
The following schedule is defined to run every third day at just after 9AM, starting on August 24.

The Daily Schedule screen presents two data entry fields, Start Date and Time and Interval of Days.
Start Date and Time
The Start Date and Time entered specifies the first date and precise time the Job will first execute. Afterward, it will execute every day at the same time, according to the Interval of Days specified in the following field. Any month, date, year and time may be entered here. If, however, a date prior to the current date and time is entered, the Job will never execute.
Tip — Use the Daily schedule type to create a Scheduled Task designed to only run on demand by pressing the Run Task ![]() button. If the Start Date is set to run 20 years in the future, for example, it will run only when requested. As is the case with all Jobs deployed to the local server, the running Job will not interfere with or appreciably slow the operation of Naviate Cloud Manager. In fact, Naviate Cloud Manager can be shut down altogether and the Job will continue to urn.
button. If the Start Date is set to run 20 years in the future, for example, it will run only when requested. As is the case with all Jobs deployed to the local server, the running Job will not interfere with or appreciably slow the operation of Naviate Cloud Manager. In fact, Naviate Cloud Manager can be shut down altogether and the Job will continue to urn.
The data entry field itself contains several commands to assist the user.

First, any segment of the date and time A can be selected for entry. This includes:
- Day of the Week
- Month
- Date
- Year
- Hours
- Minutes
- AM/PM
Select a date or time segment by clicking directly on the day, month, date, hour, etc. It will be highlighted and available for direct data entry by typing in a value. It can also be scrolled by using the keyboard up/down keys or the calendar scroll button B.
Optionally, the full calendar can be invoked by pressing the button C. The calendar can then be scrolled by month or year by pressing the ![]() and
and ![]() buttons. Months can be selected directly by clicking on the Month at the top of the screen.
buttons. Months can be selected directly by clicking on the Month at the top of the screen.
The time also appears at the bottom of the calendar window, allowing direct entry E or scrolling F. Finally, the hours box can be invoked by pressing the dialog window button G and selecting an hour H. In short, there are many ways to enter in the date and time.
Enter Interval of Days
The Interval of Days field specifies how many days are to elapse between each Job run. For example, a Job that runs every day would have an interval of 1; every other day 2; every third day 3, etc.
Once all the data has been entered on the schedule screen, press the ![]() button. It validates all entries to ensure they have been entered and conform to any rules that might apply. If it finds any problems, it displays a message stating exactly what the problem is.
button. It validates all entries to ensure they have been entered and conform to any rules that might apply. If it finds any problems, it displays a message stating exactly what the problem is.
If the data entered passes validation, the ![]() button is enabled and available for interaction. This button must be pressed to retain all data entered on the scheduling screen. Once pressed, it automatically returns to the original Job data entry screen.
button is enabled and available for interaction. This button must be pressed to retain all data entered on the scheduling screen. Once pressed, it automatically returns to the original Job data entry screen.