NWC
NWC allows the user to export NWC files from a selected Revit® model, while also allowing the user to filter select which of the model's 3D views are to be exported. The user is then able to specify the location to which the file will be saved. Each model has it's own folder created in the specified Export Folder Location. The user also has the ability to modify the NWC Export Options via the dropdown selection to provide export flexibility.
With NWC selected, press the ![]() button to the right of the Export Type field to bring up the Export NWC Configuration Settings dialog box.
button to the right of the Export Type field to bring up the Export NWC Configuration Settings dialog box.
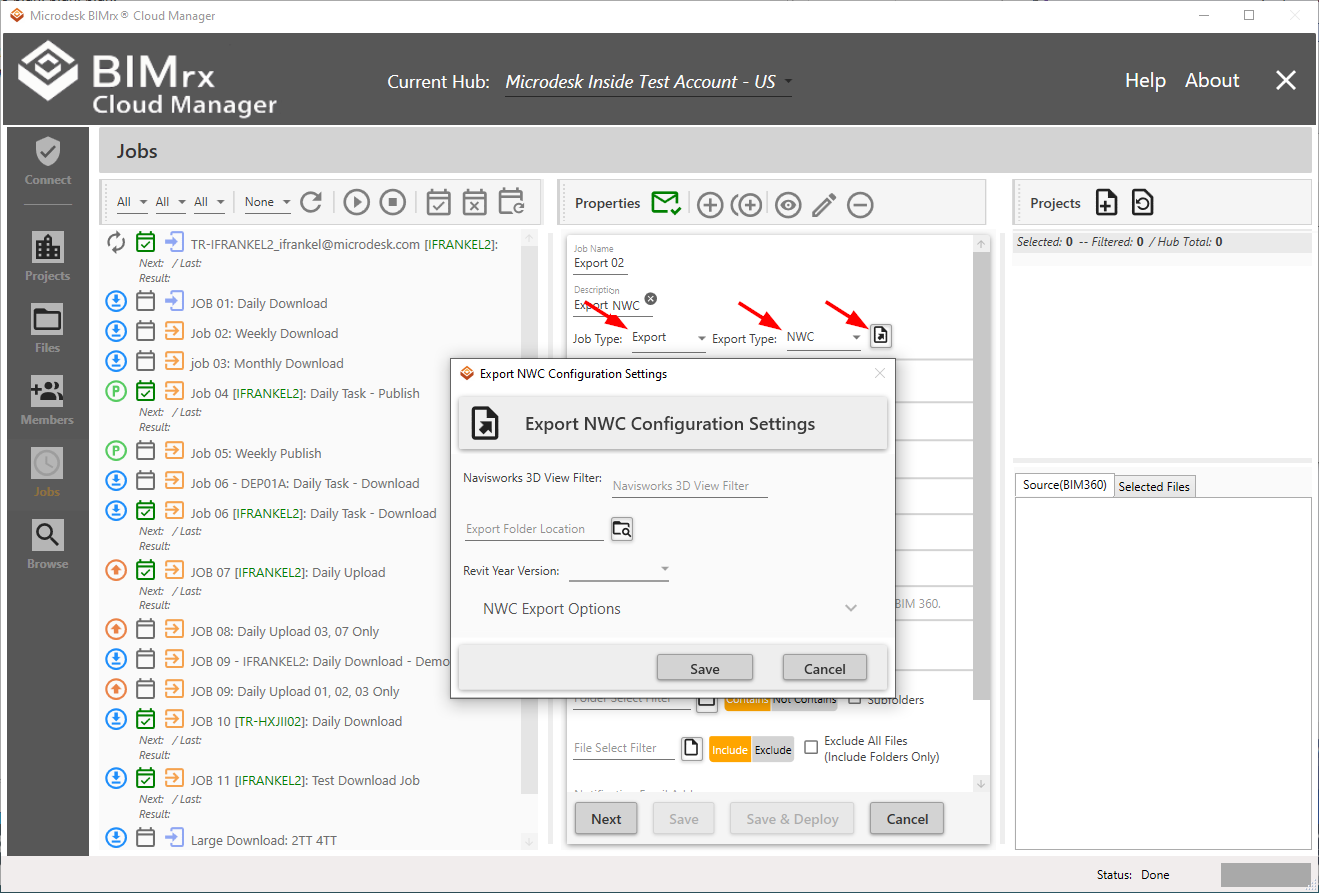
Navisworks 3D View Filter
The Navisworks 3D View Filter allows the user to filter select which of the model's 3D views are to be exported.
Export Folder Location
The Export Folder Location makes it possible to specify the location where the files will be saved.
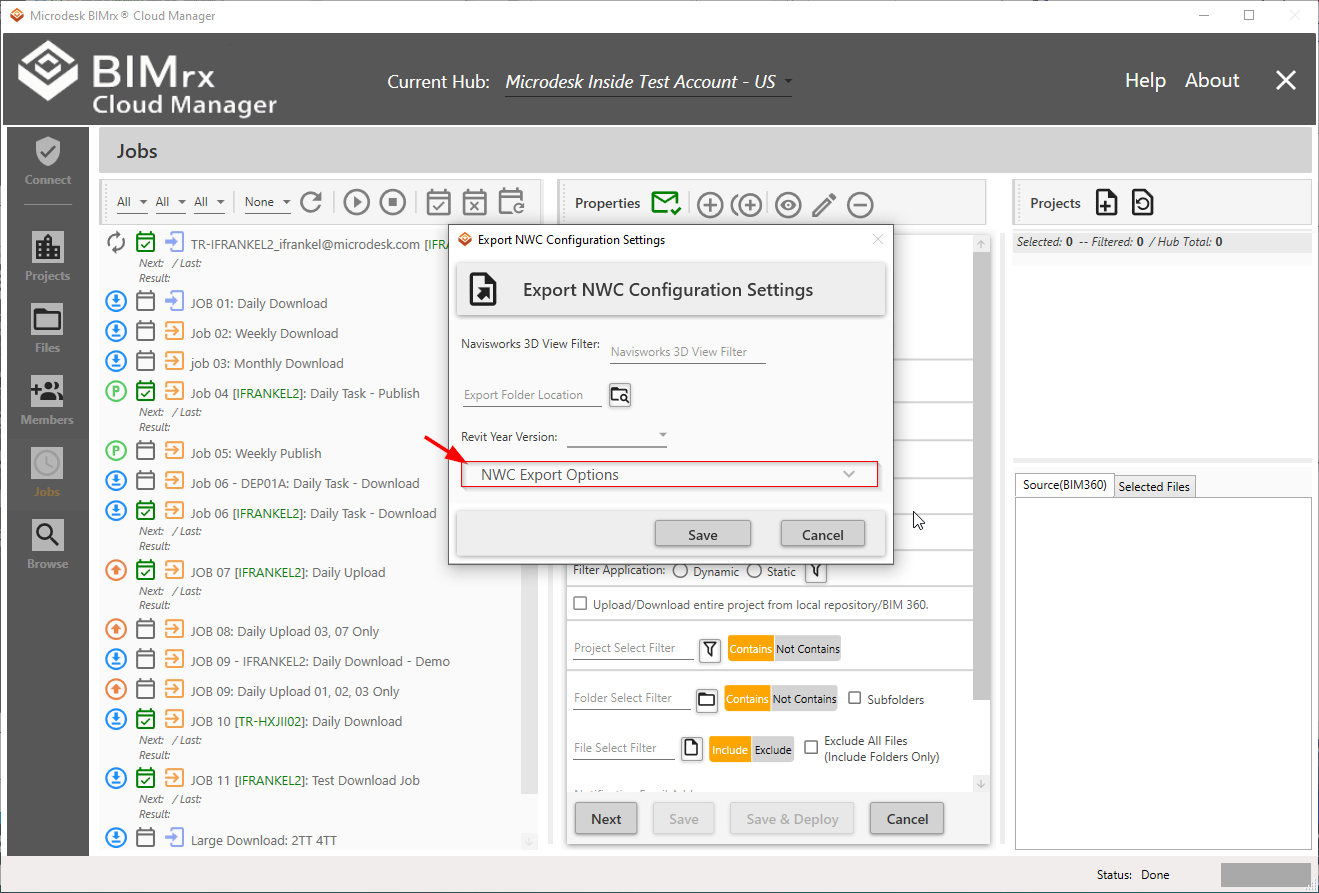
NWC Export Options
BIMrx® Cloud Manager contains additional NWC Export Options that are set to default values. If these default values are acceptable, they need not be changed.
However, to view the settings of the default options and make any necessary changes, click anywhere on the NWC Export Options label (on the left), down arrow (on the right) or anywhere in between to expand the window. To collapse the bottom portion, simply click it again anywhere on the same row.
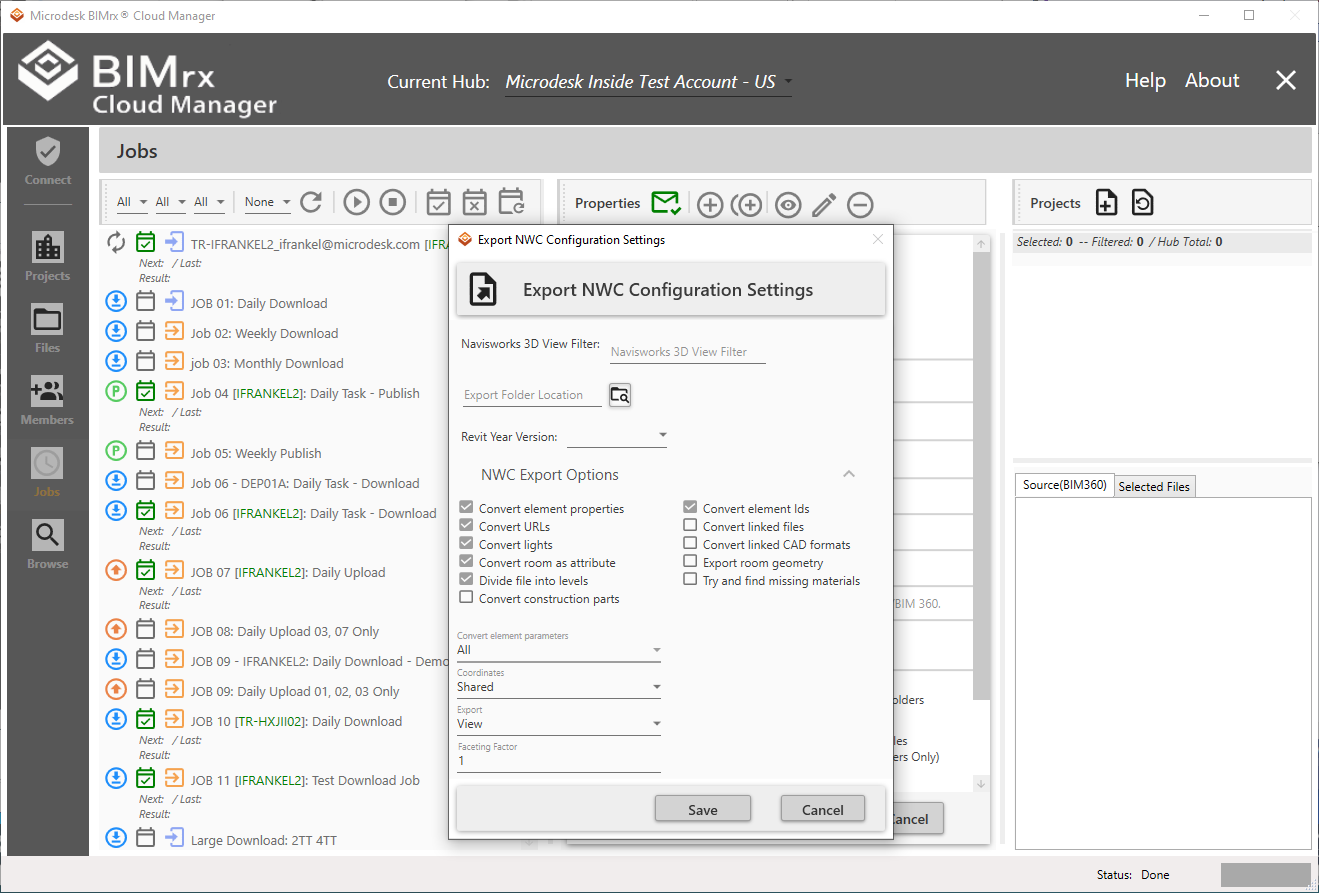
Viewing the NWC Export Options shows the current settings. To use these settings, nothing more need be done. However, these settings may be changed to suit the user's need.
When editing is complete, press Save or Cancel. These settings can be modified at any time prior to deploying the job. Once the job has been deployed, however, they cannot be changed. To change the settings, the job will first need to be un-deployed; the settings changed and saved; then the job must be redeployed.
Convert element properties
The Convert element properties checkbox...
Convert urls
The Convert urls checkbox...
Convert lights
The Convert lights checkbox...
Convert room as attribute
The Convert room as attribute checkbox...
Divide file into levels
The Divide file into levels checkbox...
Convert construction parts
The Convert construction parts checkbox...
Convert element ids
The Convert element ids checkbox...
Convert linked files
The Convert linked files checkbox...
Convert linked CAD formats
The Convert linked CAD formats checkbox...
Export room geometry
The Export room geometry checkbox...
Try and find missing materials
The Try and find missing materials checkbox...
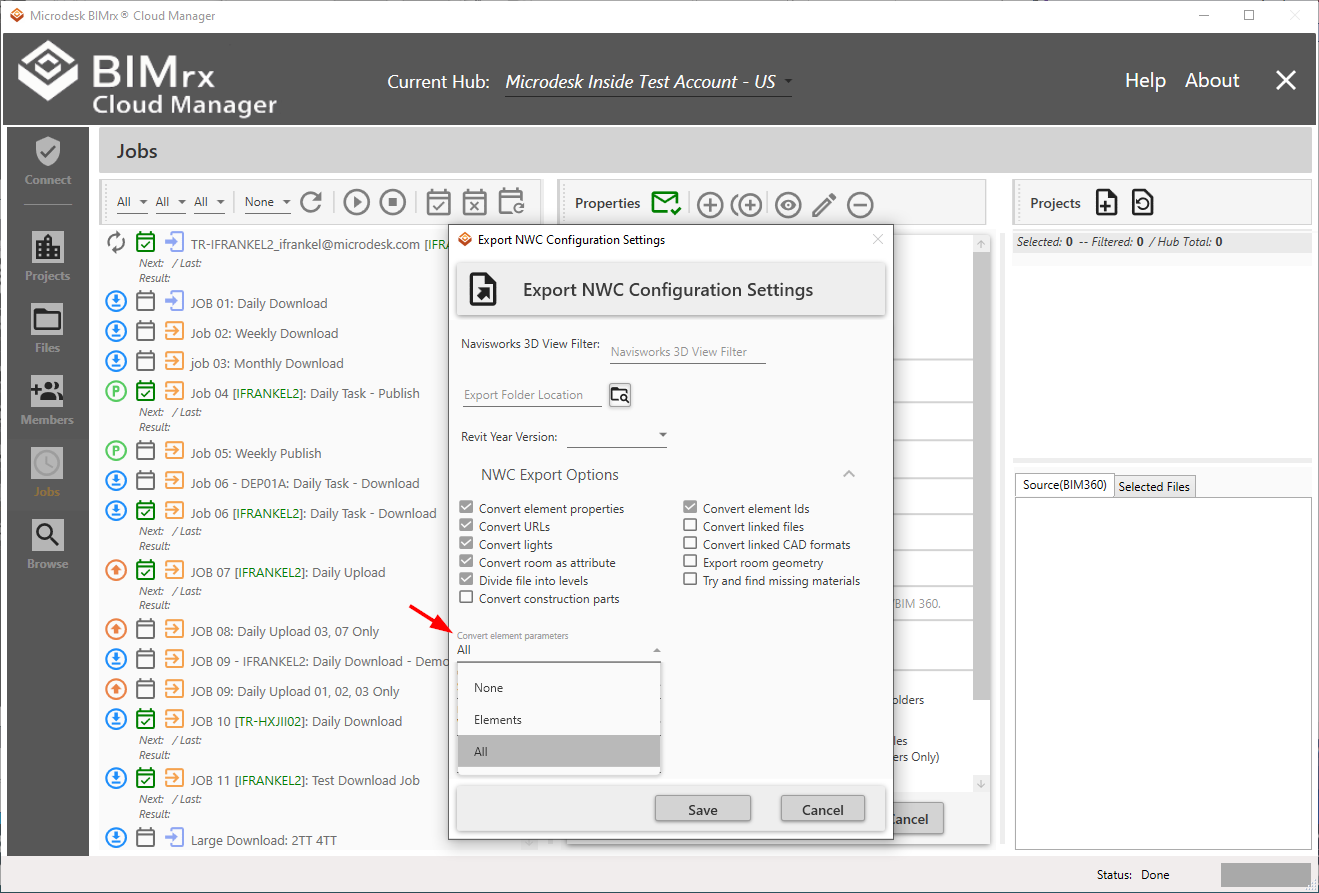
Convert element parameters
The Convert element parameters does... The drop down list provides three choices:
- None--
- Elements--
- All--
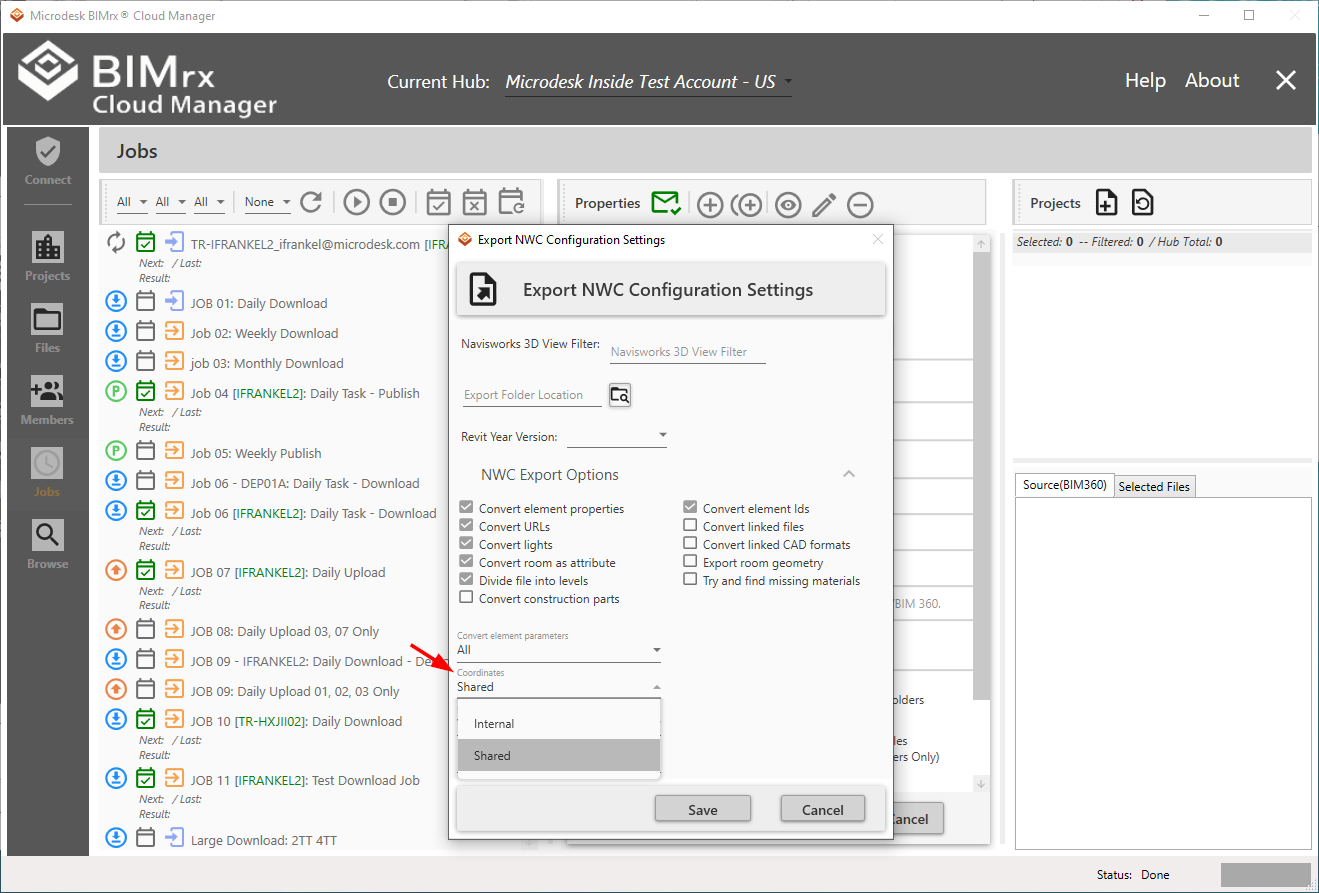
Coordinates
The Coordinates does... The drop down list provides two choices:
- Internal--
- Shared--
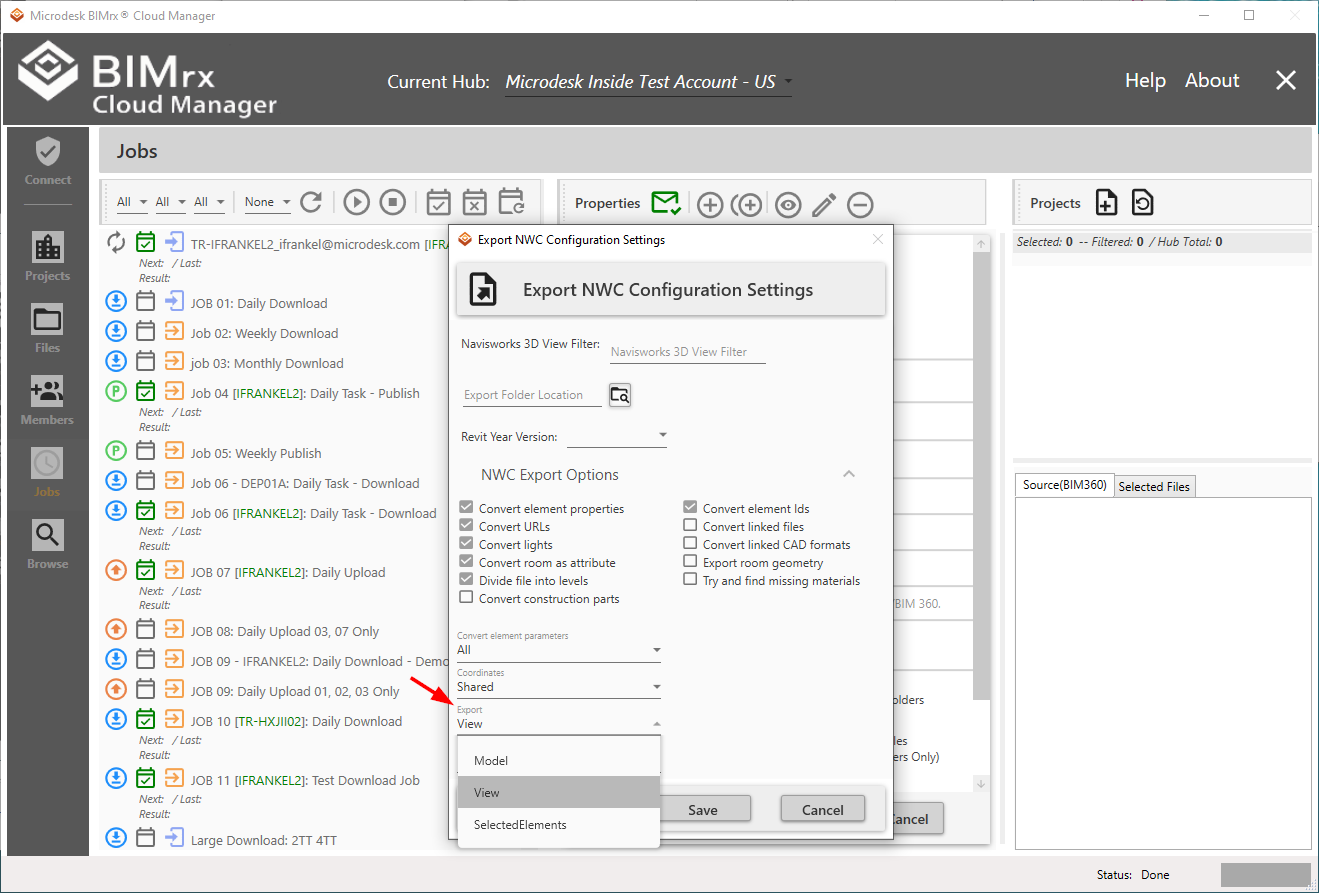
Export
The Export does... The drop down list provides three choices:
- Model--
- View--
- SelectedElements--

Faceting Factor
Faceting Factor does...
When editing is complete, press Save or Cancel. These settings can be modified at any time prior to deploying the job. Once the job has been deployed, however, they cannot be changed. To change the settings, the job will first need to be un-deployed; the settings changed and saved; then the job can be redeployed.