Set Default Company
The Company button is used to set the selected Hub Members Default Company to that of the Company selected in the Member Access Settings pane. The Company button is located on the Hub Members tab.
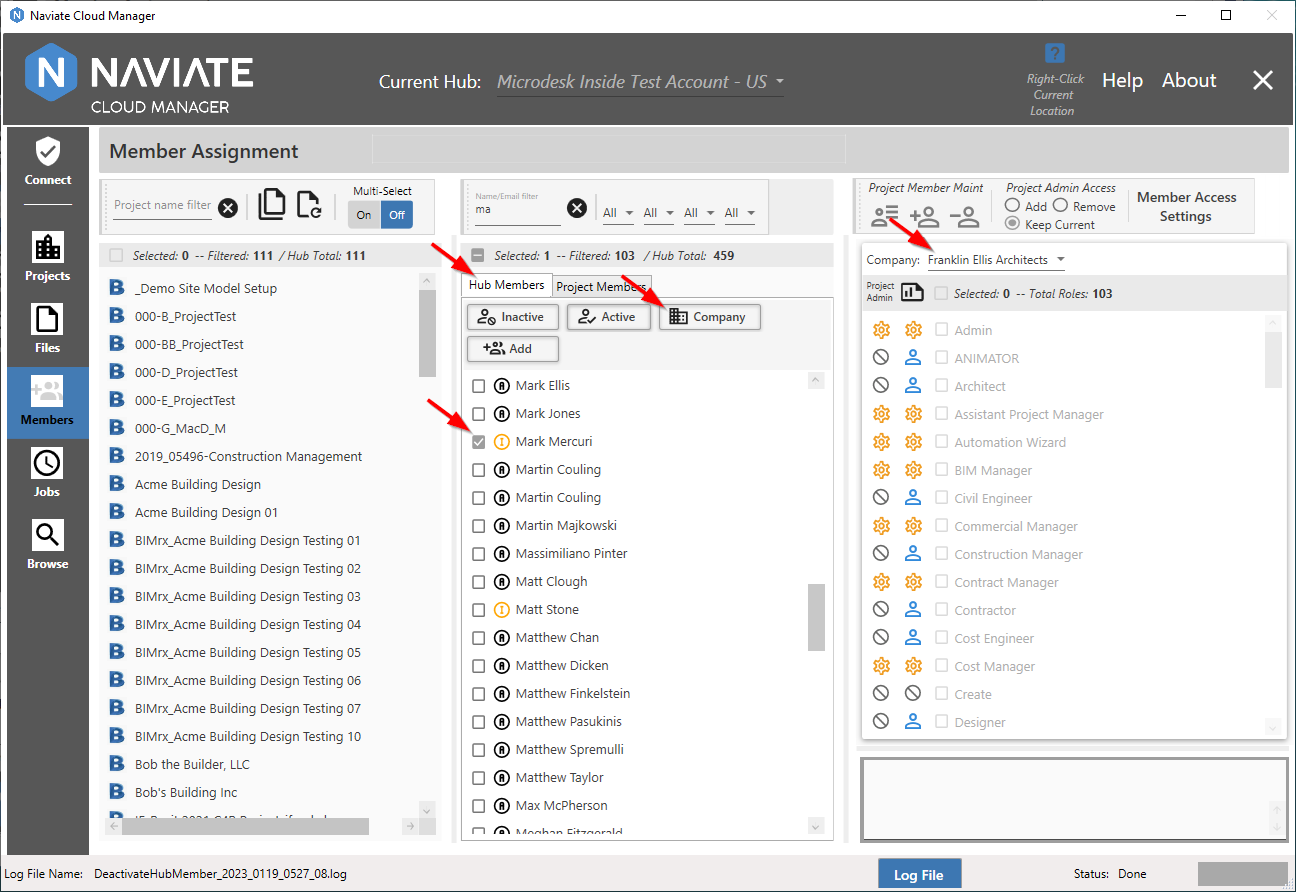
For the ![]() Company button to be enabled, at least one Hub member must be selected.
Company button to be enabled, at least one Hub member must be selected.
To view the current Default Company setting, locate the Hub member and place the mouse cursor anywhere on the line for that member.
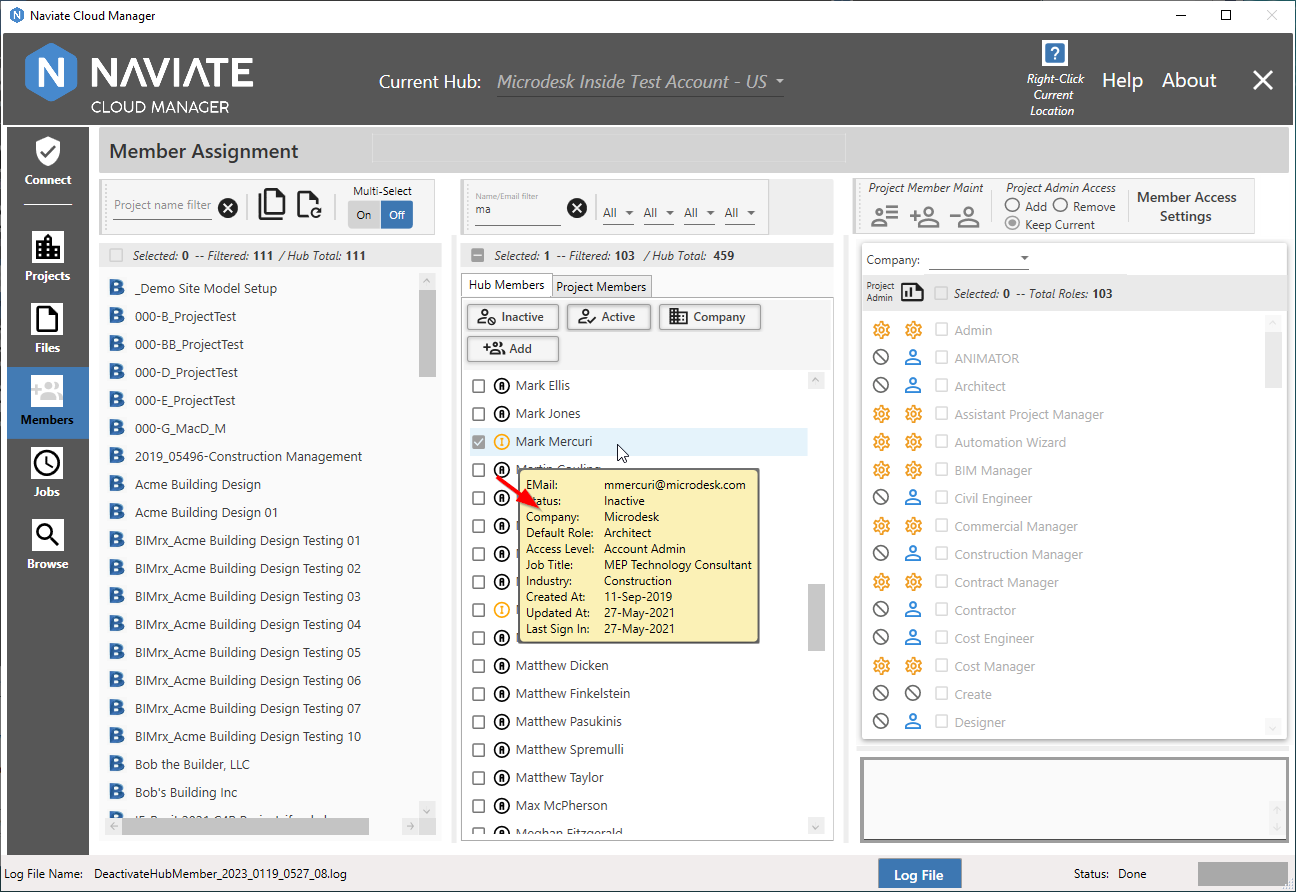
As shown above, it is not necessary to check the member so view the information.
In addition to viewing this information from the Hub Members tab, it is also available from the Project Members tabs.
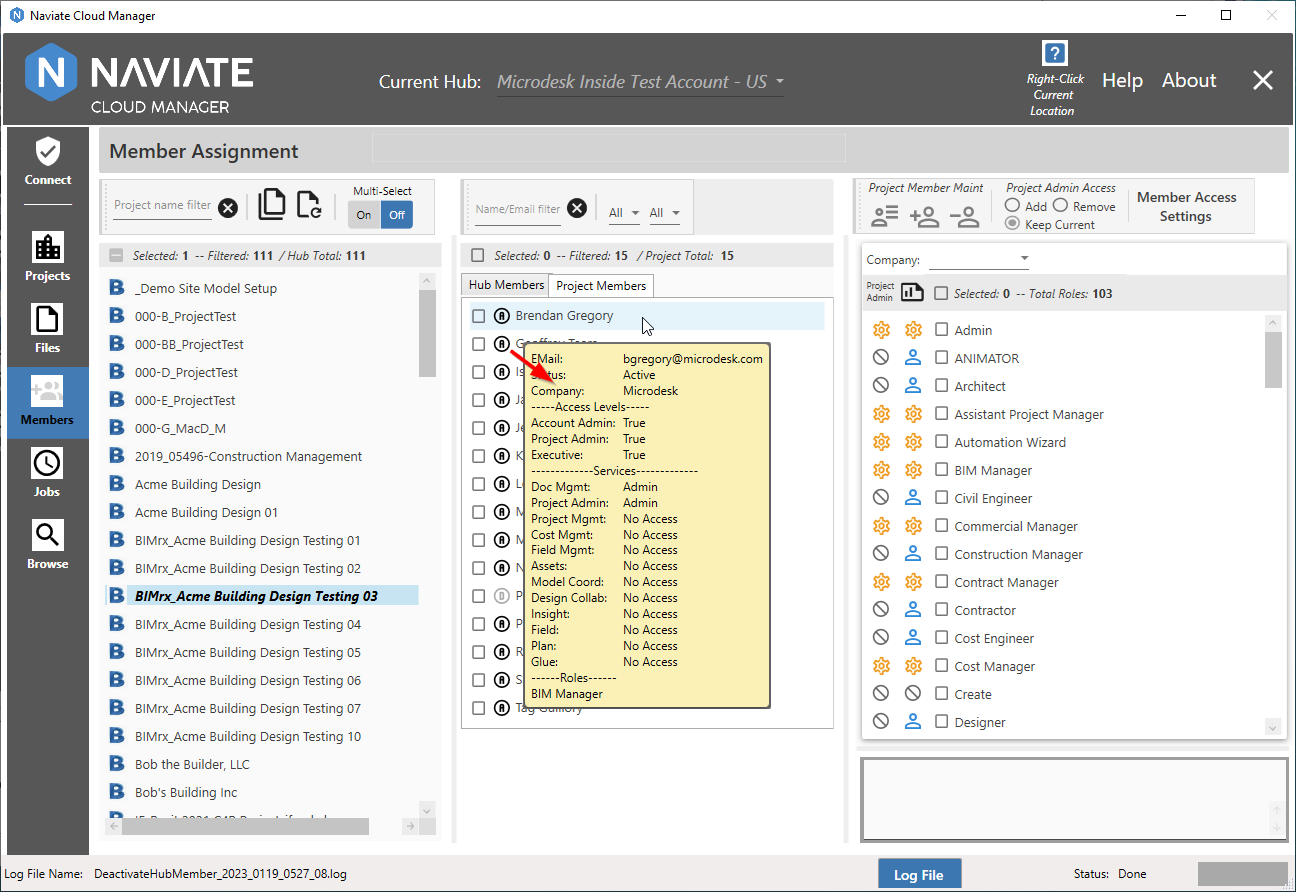
Here we see single-project select mode (Multi-Select is set to Off) displayed. Although it displays some different items than for Hub members, the information popup is accessed in the same way and displays the default Company in the same place. This information is available for all project members displayed, including those displayed as Disabled (i.e., Inactive at the Hub level, shown as grayed-out, for example,  ).
).
There's little difference between displaying single project (above) or multiple projects (below).
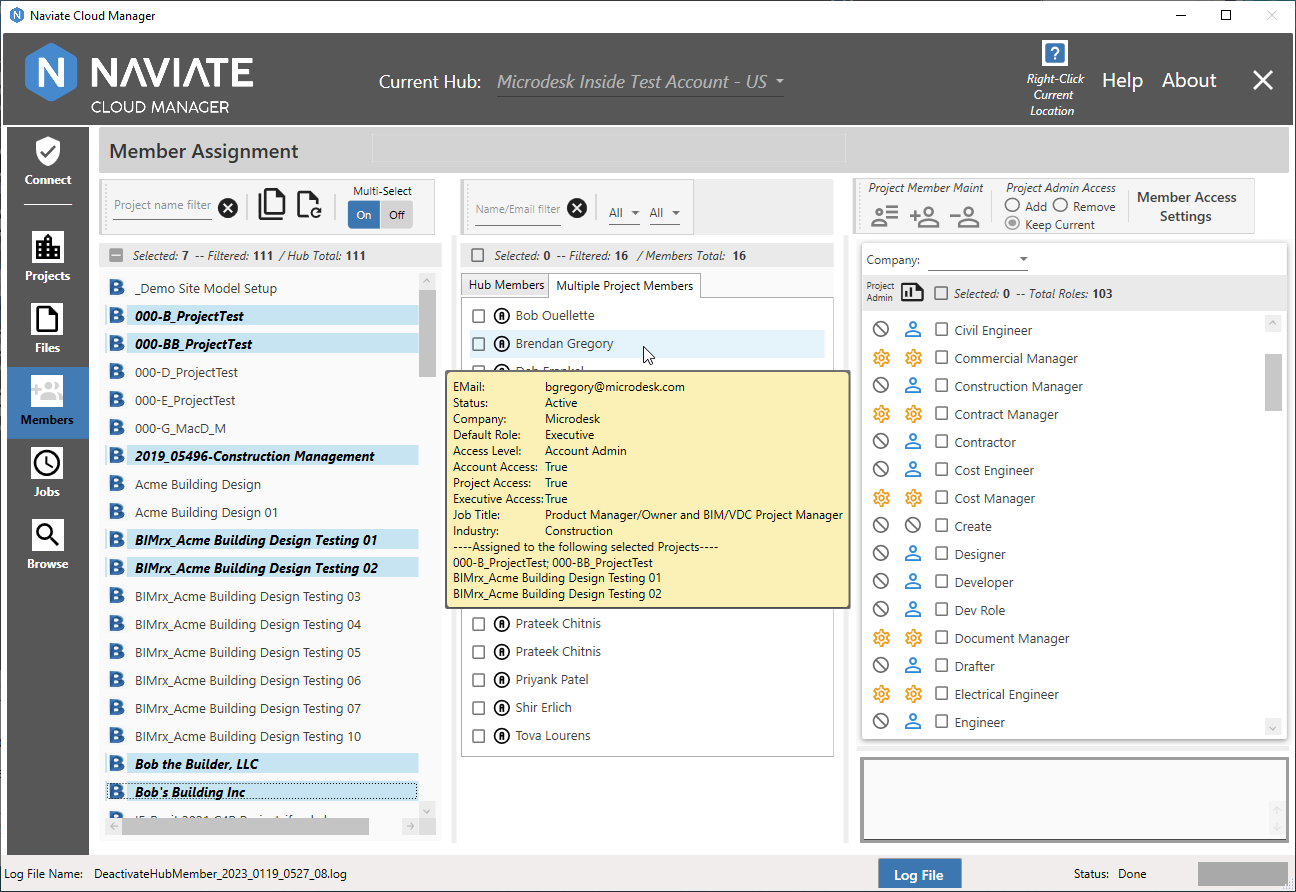
The good news here is that no matter what variation of member data is currently being displayed, the current company is always readily available.
Once the desired company is known, the update procedure is ready to begin.
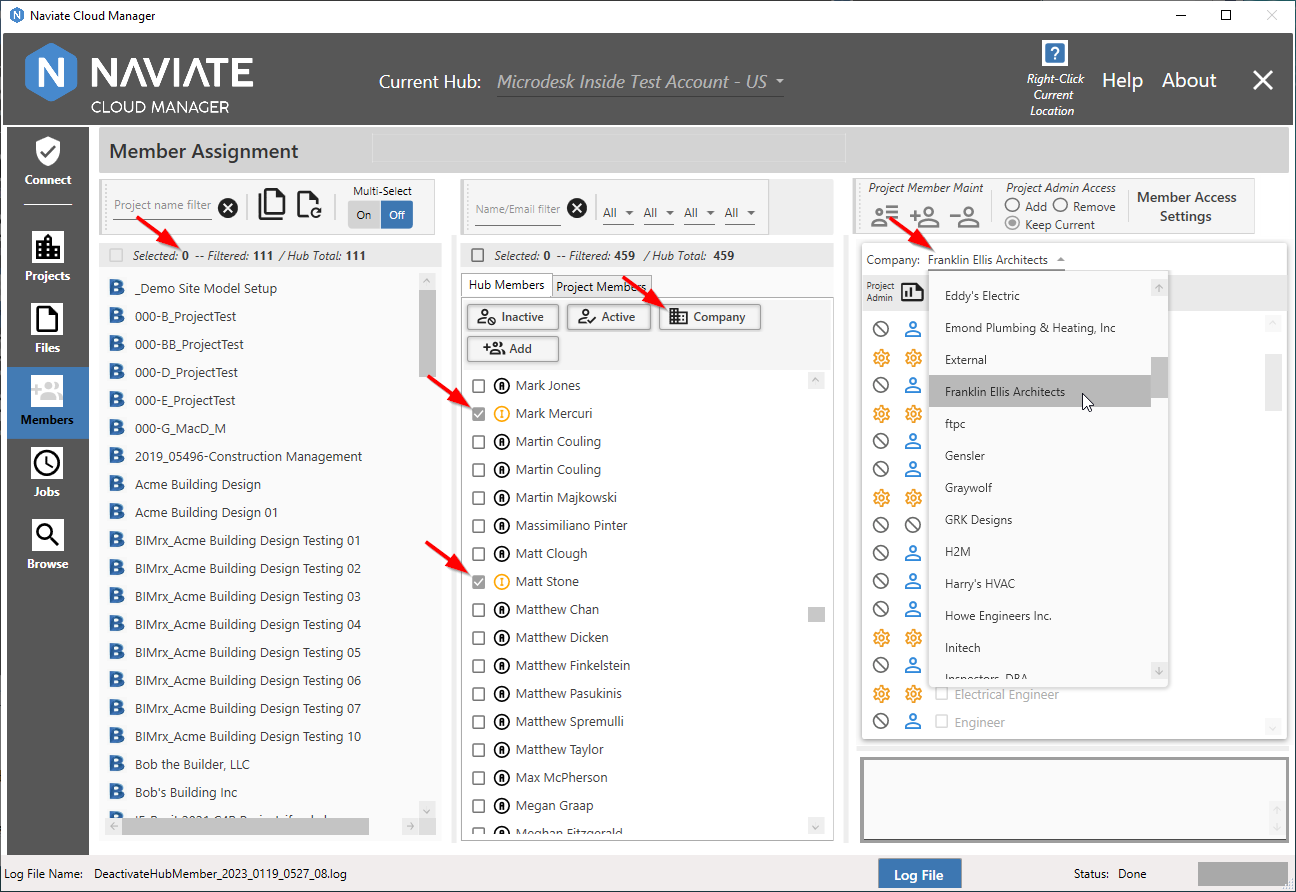
Start by deselecting all projects. This will cause the ![]() button to be enabled. Next select one or more Hub members to whom the new default Company will be assigned. These members must have a Status of Active or Inactive. This should now cause the Company button to be enabled. The last requirement is to select the new default Company.
button to be enabled. Next select one or more Hub members to whom the new default Company will be assigned. These members must have a Status of Active or Inactive. This should now cause the Company button to be enabled. The last requirement is to select the new default Company.
Please Note — Hub members must be either Active or Inactive Status for the Default Company to be set. Members having a Status of Pending or Not Invited will be skipped.
Once everything is ready, press the ![]() to perform the update. The Set Default Company for selected Hub Members(s) dialog now appears:
to perform the update. The Set Default Company for selected Hub Members(s) dialog now appears:
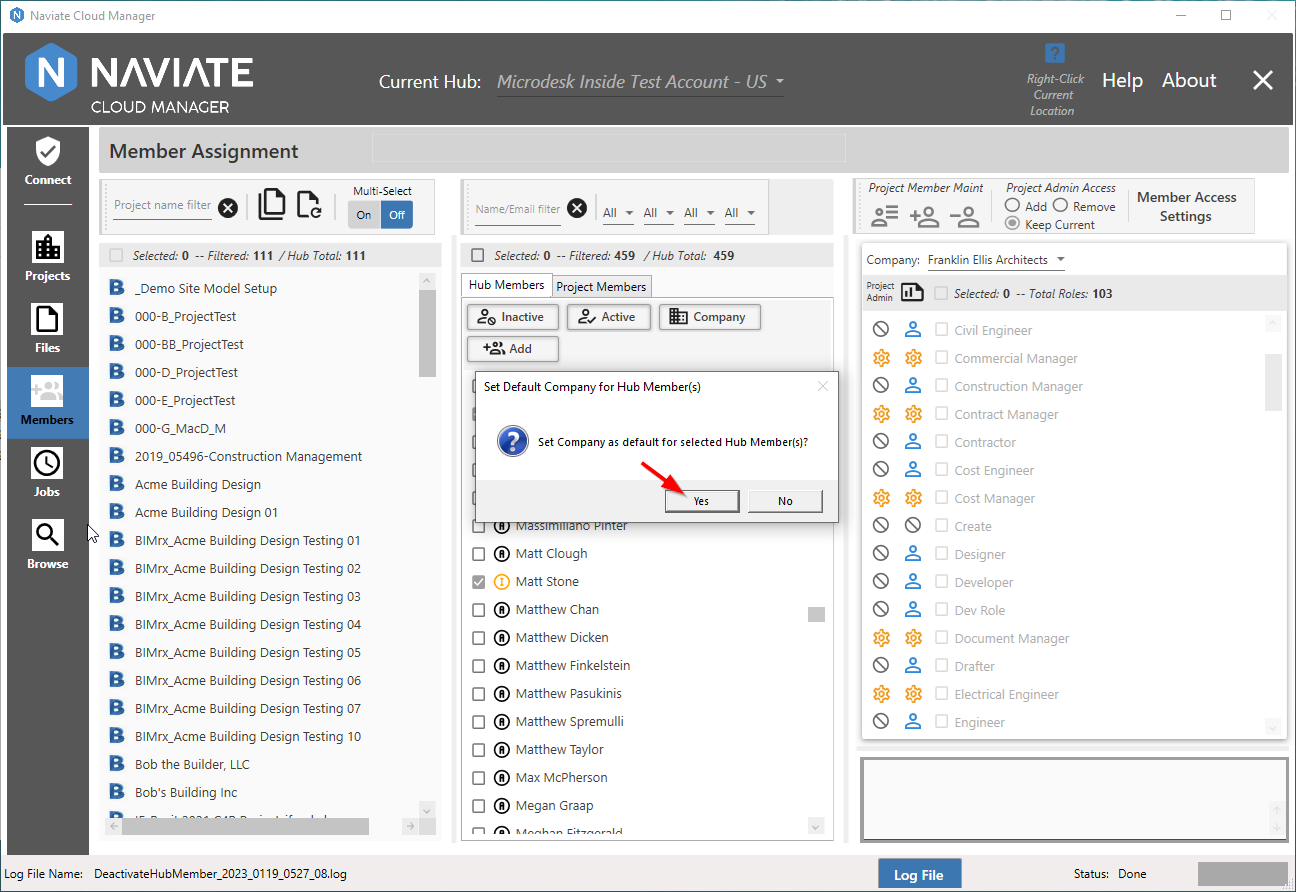
This is the last chance to verify the data being changed is correct. If not, you can choose No and either change the selections made or move on to something else entirely. However, if all is correct and you wish to proceed, press Yes to continue.
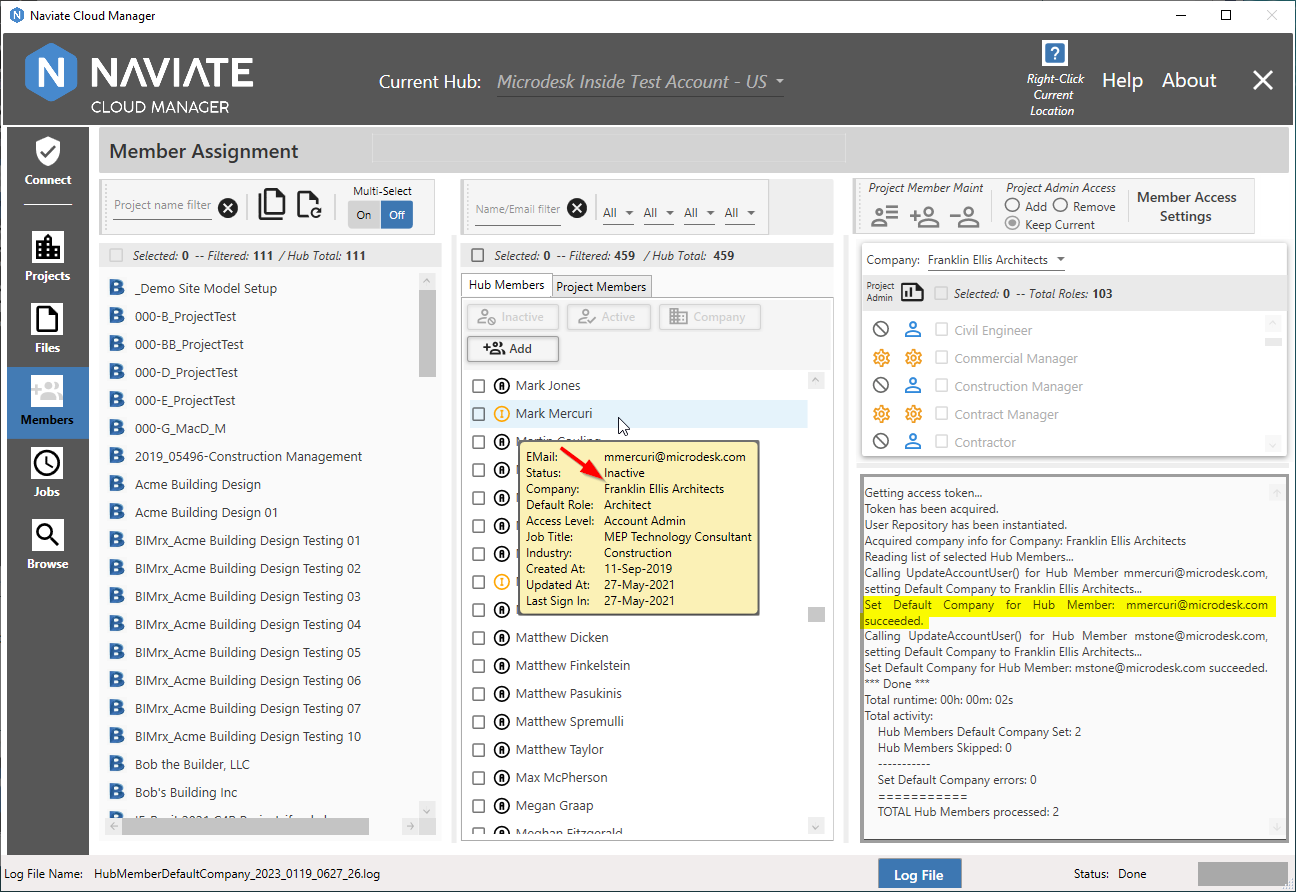
On completion, notice the processing results in the log file to the right of the screen. This window can be sized larger or smaller as required. As the process progresses, the log display information constantly moves up automatically, allowing convenient access to the most recent results.
Tip — Use the statistics at the end of the log file for a quick summary of the update. This includes the number updated, skipped, processed and errors. It also includes the amount of time spent processing.
The log information, as is usually the case, is also available in the Log popup viewer.
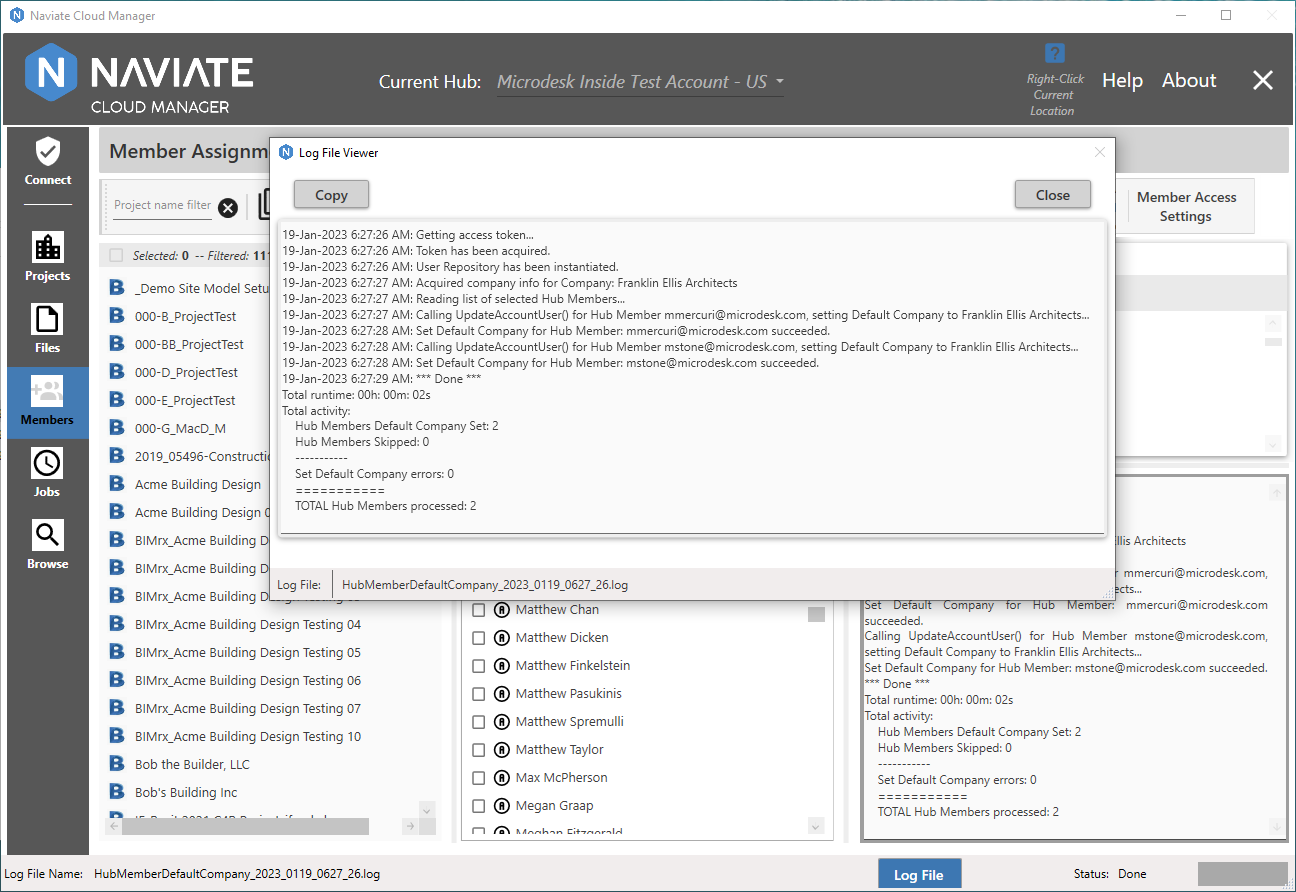
The log popup viewer allows a larger format to view log files than the in-screen viewer, as well as the handy ![]() button for pasting log text into other documents. Both viewing methods are available to provide the user multiple options to best suit their preferences and the demands of a given situation.
button for pasting log text into other documents. Both viewing methods are available to provide the user multiple options to best suit their preferences and the demands of a given situation.