License Upgrade
When a user with an existing license, such as the Standard license, is ready to apply their newly upgraded Professional license, there is a simple procedure to follow.
From anywhere in Naviate Cloud Manager, press the About button to bring up the About screen. From the About screen, press the Manage License button to bring up the License Activation screen (see License Activation, preceding this section).
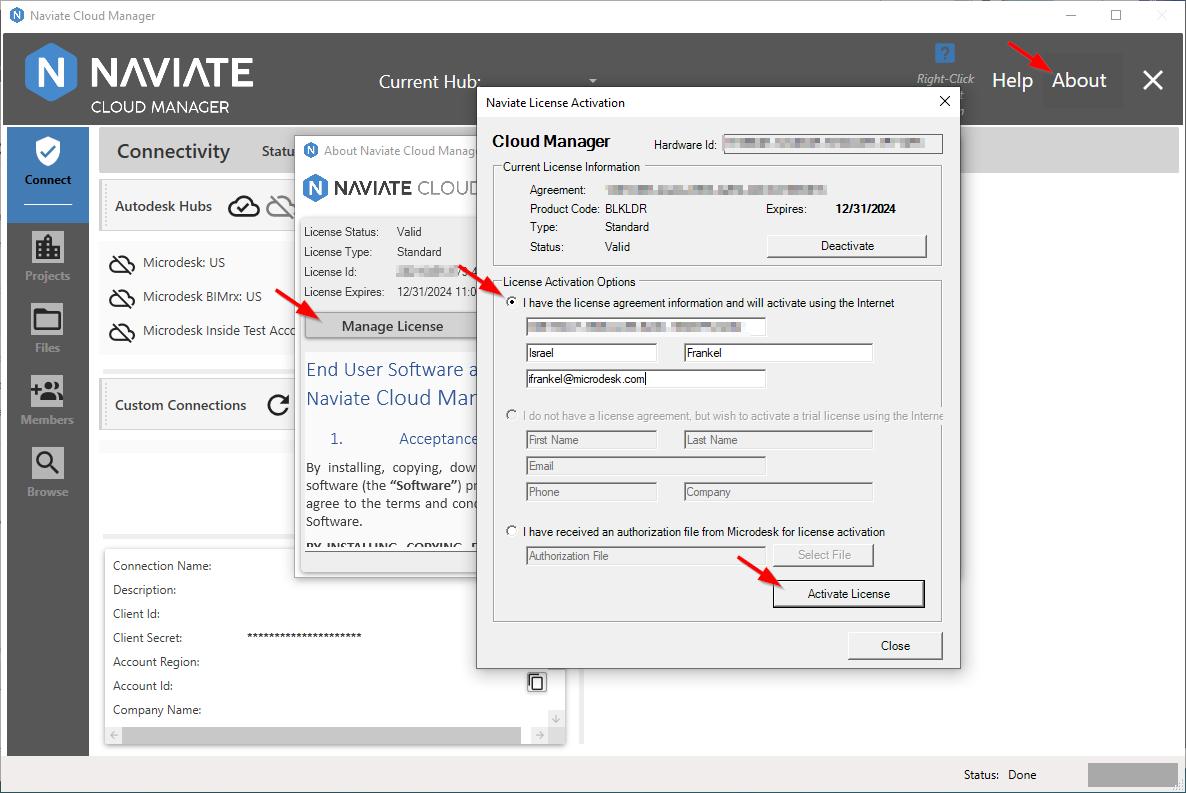
Once the license information has been entered and the Activate License button pressed, control is returned to the About window.

We now see the About window has updated to reflect the new License Type that was just applied.
After closing the About box, we now see the Professional License changes have been applied to the Main Screen.
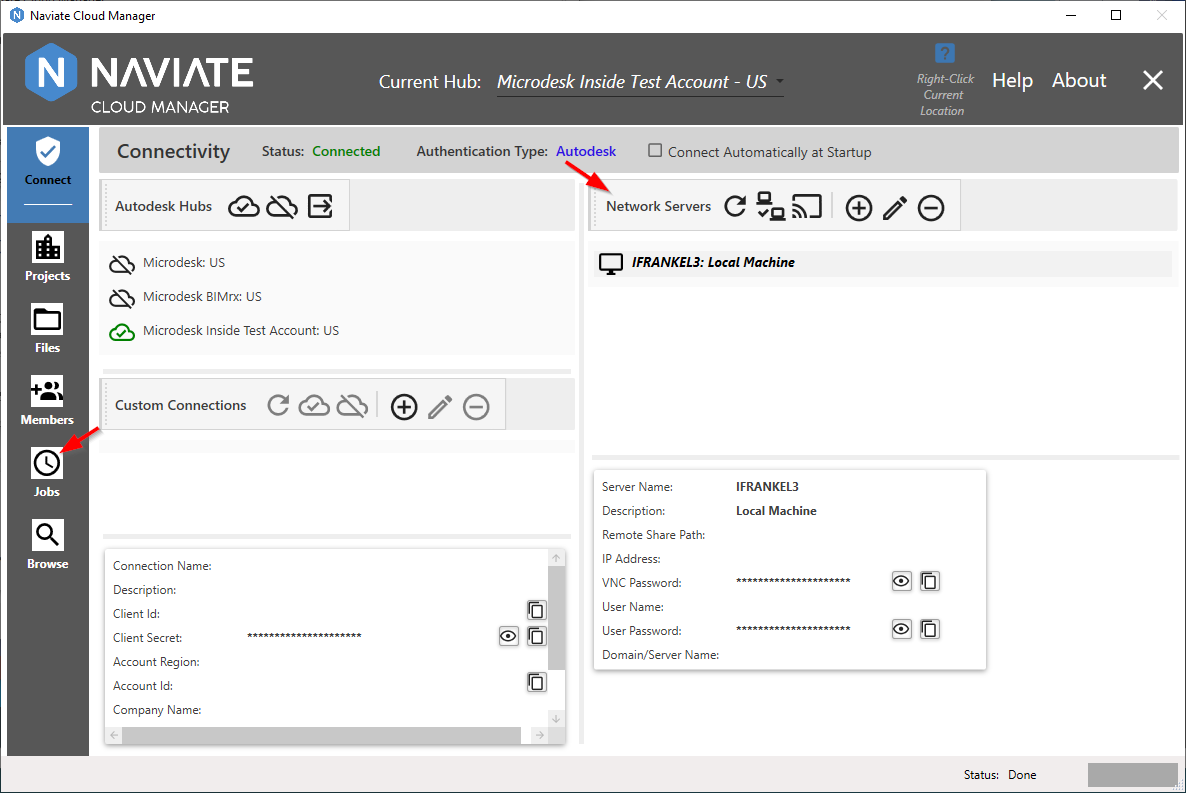
The Jobs menu item now appears and is ready for use, and the Network Servers panel has become visible.
Please Note — As the comprehensive reference manual for Naviate Cloud Manager, this User Guide almost exclusively shows the presence of the Jobs menu and the Network Servers panel. However, apart from its presence or absence, all other application features and functionality described are identical — regardless of the license type.