Section
With the help of the Section command, the user can quickly create a properly sized and oriented section view upon selecting an element in a Plan or RCP view. A section will be created parallel to the element with a narrow depth and height. The Section command could be performed on any object found in the host or linked model.
Starting The Command
In Revit:
- User must be in a plan view.
- Navigate to the BIMrx tab >> BIMrx Core panel >> Section command:

- Hover over the element you want to create the section from, the nested lines inside the element will highlight as you pass over them.
- Click on the desired line.
- If the Prompt for side to place Section option is checked in the Section Settings, you will be prompted to pick a point on the side you want the section to be created on.
- The command will create a section parallel to the selected element with a narrow depth and height.
- The left and right cropping will be relative to the selected element.
- The top crop will be a short distance above the selected object in section view.
- The bottom crop will be relative to the nearest floor below the selected object.
- The section type will be determined by the Default view type section creation option in the Section Settings.
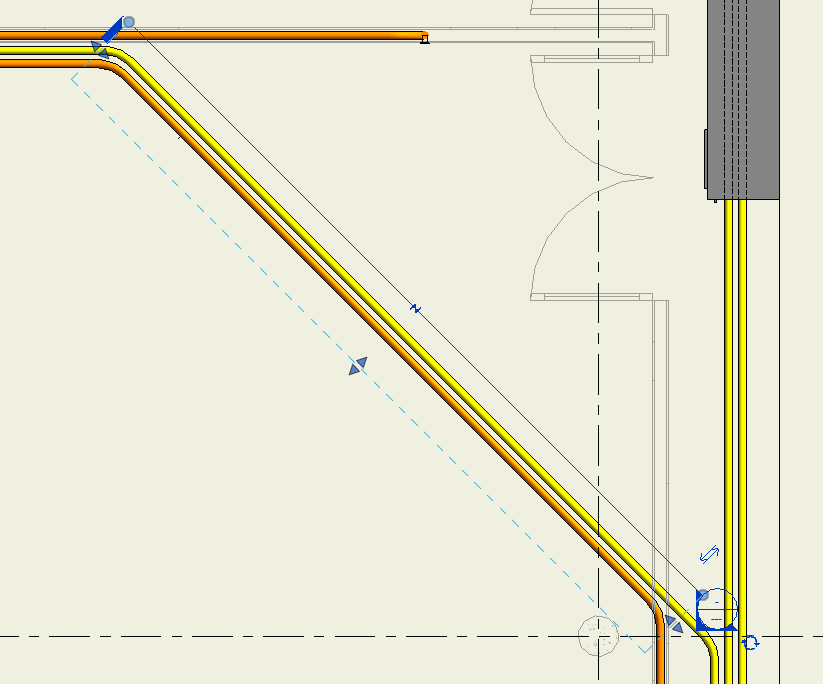
Example of automatic placement and cropping in Plan View of a selected element (conduit):
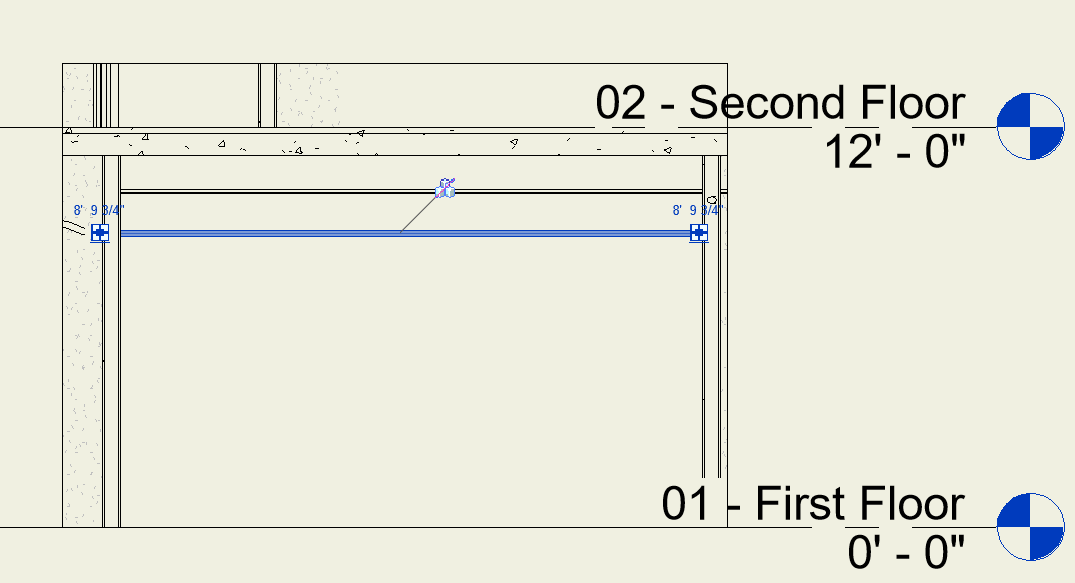
Example of this BIMrx Section View, switched from Coarse to Fine to highlight element selected (conduit):
Notes:
- The Section command works in a 2D Floor Plan or RCP.
- The command does not work in 3D views or other Section/Elevation Views.
- If the element was picked without highlighting a specific line, the closest internal line to the pick point will determine the section's base line for placing the Section on second click.