Select Projects
Navigate to the Files menu. While the project list displays automatically, it's never a bad idea to press the Refresh the local projects data list ![]() button to display all Local Projects. This ensures that any recent changes to the Naviate Cloud Manager database or the underlying files system are reflected in the current display. Optionally, set the filter to to include only those projects with locatable files, as discussed in the previous section.
button to display all Local Projects. This ensures that any recent changes to the Naviate Cloud Manager database or the underlying files system are reflected in the current display. Optionally, set the filter to to include only those projects with locatable files, as discussed in the previous section.
Select a project by clicking on it and causing the project checkbox to display as checked ![]() . Once one or more projects have been selected from the list, please notice the Local Files display in the center column is updated to reflect the file/folder contents on local disk for the selected project(s).
. Once one or more projects have been selected from the list, please notice the Local Files display in the center column is updated to reflect the file/folder contents on local disk for the selected project(s).
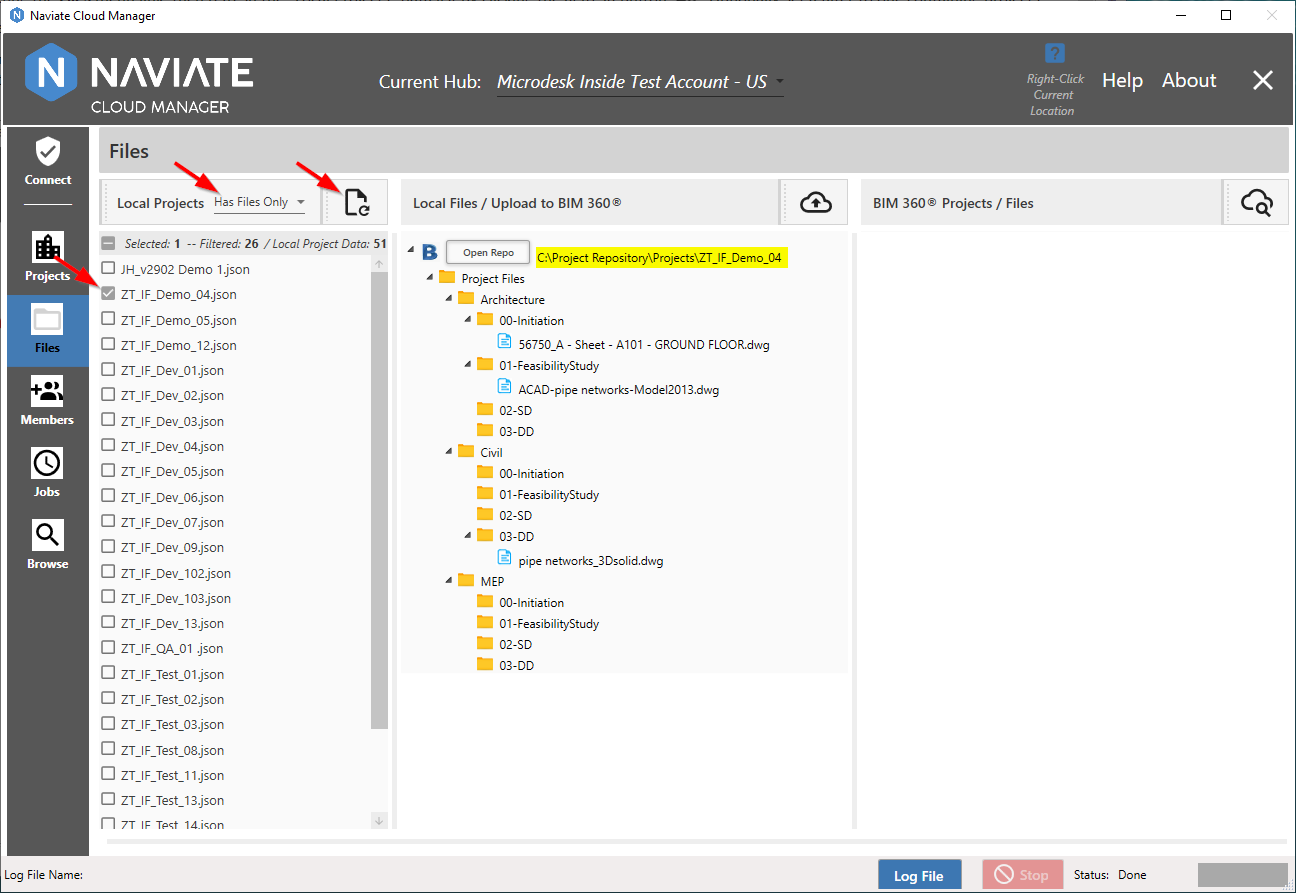
In the Local Files tree view the root entry for each project indicates the path to the Autodesk® BIM 360® Project folder in the cloud and the path to the project files on the local file system.
Note — The first-level folder path — Project Files, in the above example — must always map to an existing BIM 360® folder. This also applies to the Plans folder. Renamed Project Files and Plans folders are also supported, as long as they are already in place in BIM 360® and are referenced by the exact same renamed name for the local folder name.