Add Projects to BIM 360/ACC
To add one or more projects to Autodesk® BIM 360®, make sure the Add checkbox column for each project row is checked, or unchecked to remove it from selection. The checkbox is turned off or on by clicking anywhere on the row of the desired project. If unchecked, clicking the row will check it. If checked, clicking the row will uncheck it. Select a New Template ![]() at any time to completely replace the contents of the grid with a newly loaded template of projects. At any time, all projects can be removed from the selection grid by pressing the Clear
at any time to completely replace the contents of the grid with a newly loaded template of projects. At any time, all projects can be removed from the selection grid by pressing the Clear ![]() button.
button.
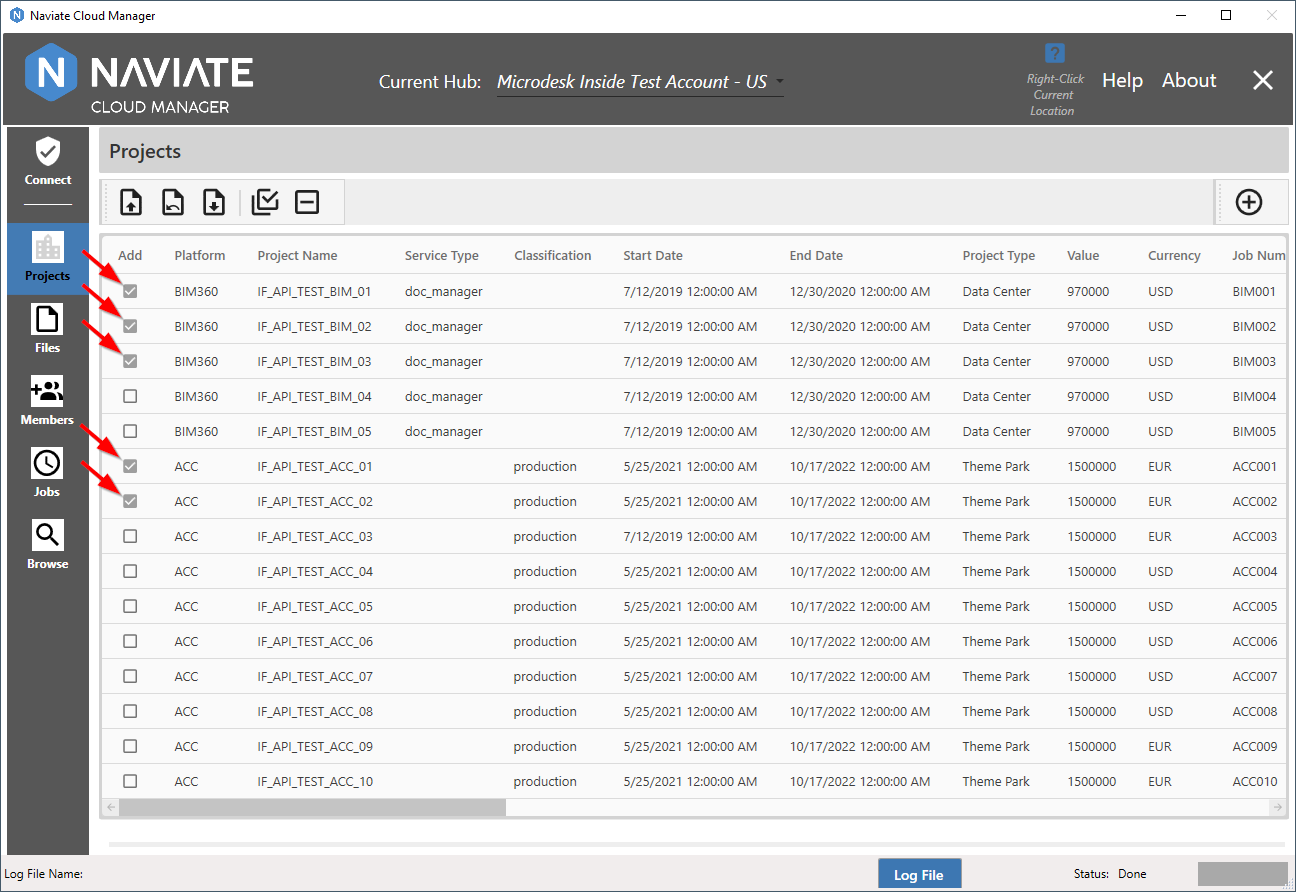
Once the projects have been selected, the next step is to click the ![]() Add Selected Projects button.
Add Selected Projects button.
While the projects are processing, as each selected project is added the activities are displayed, providing a real-time progress update showing each project that is added.
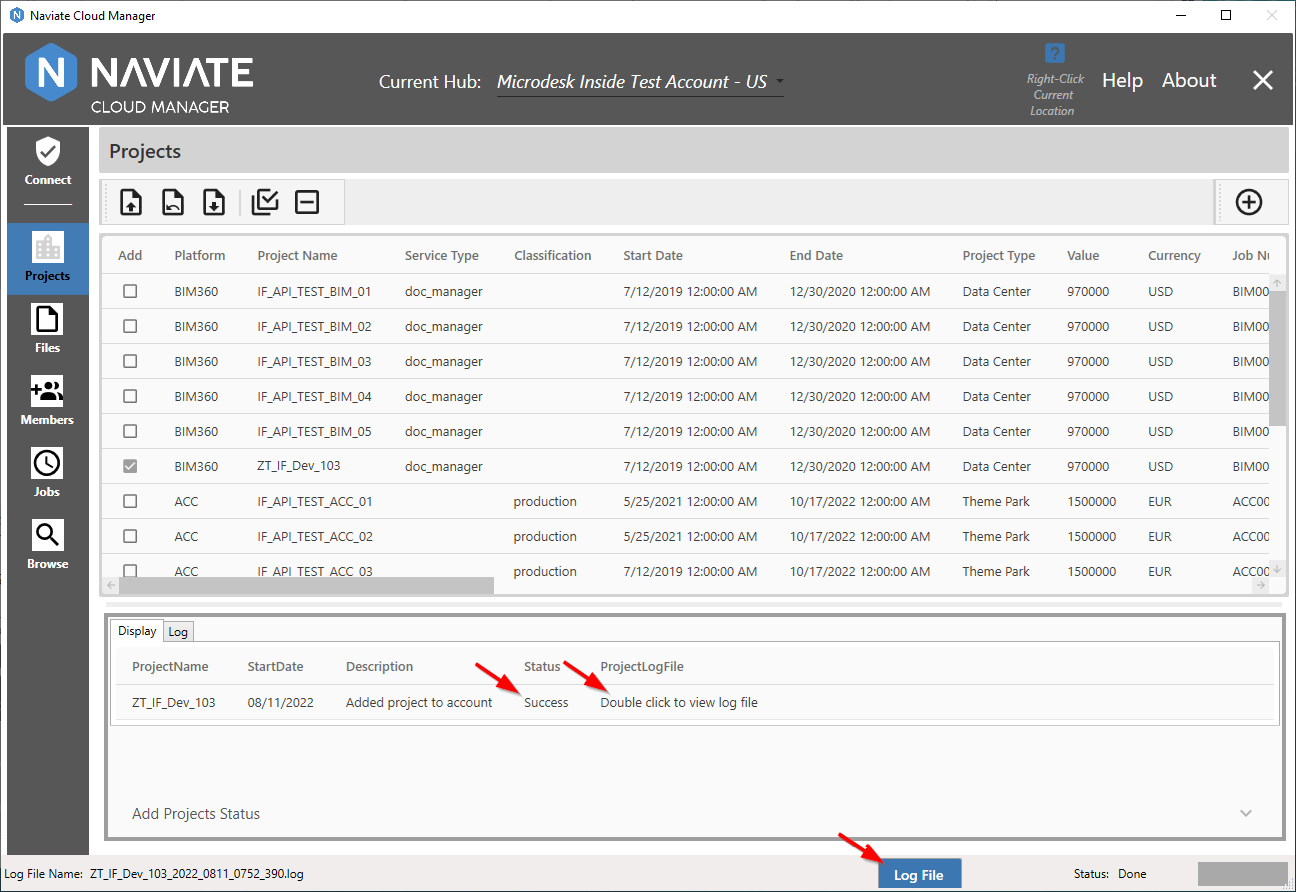
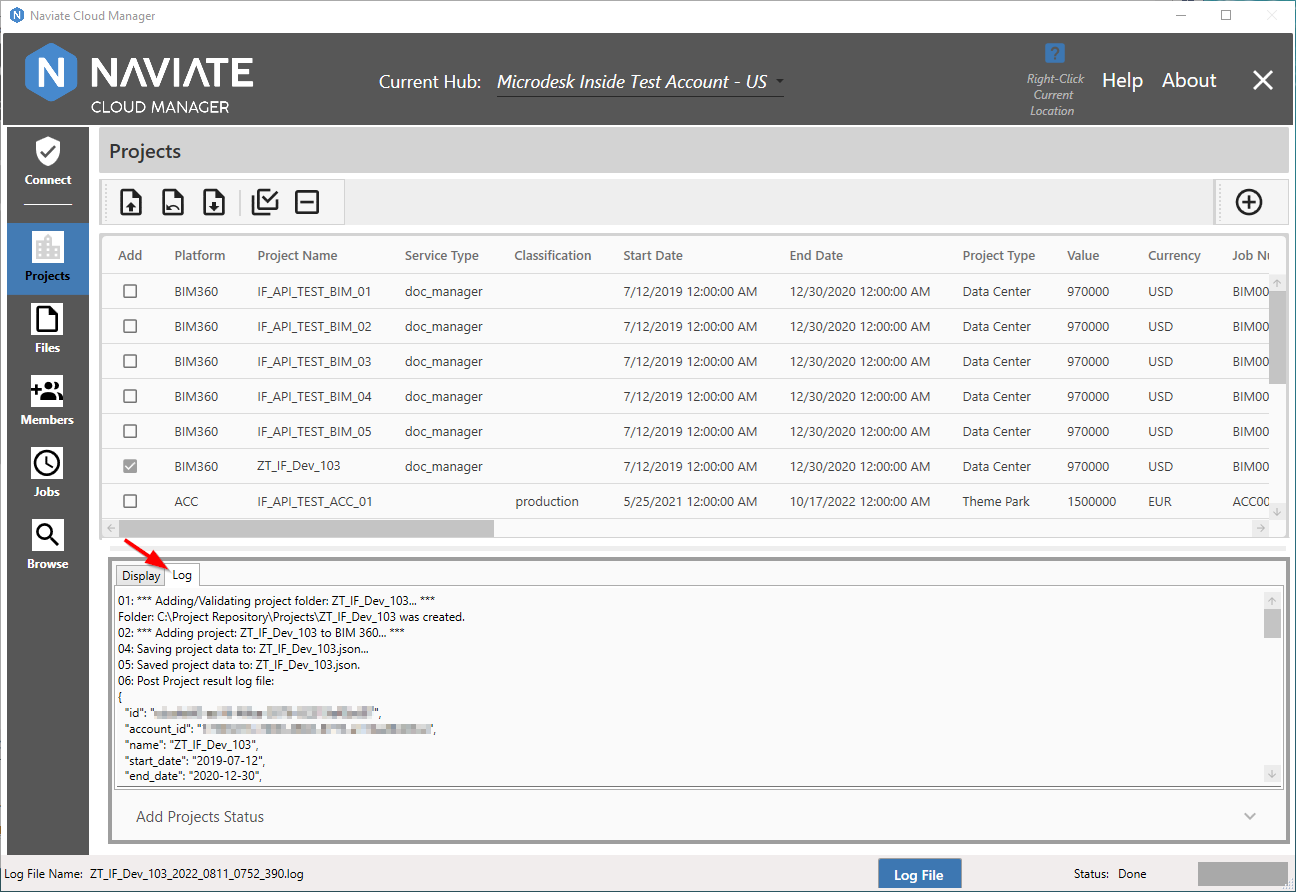
Explore the Log tab sheet, to the right of the Display tab sheet, for an in-place view of all the project addition details and information.
Finally, press the ![]() button on the bottom of the main screen to display the log file in its own window. This is not only convenient for viewing the log information while not having to re-arrange the main screen, but also provides a handy Copy button to make the transfer of information easy if required.
button on the bottom of the main screen to display the log file in its own window. This is not only convenient for viewing the log information while not having to re-arrange the main screen, but also provides a handy Copy button to make the transfer of information easy if required.
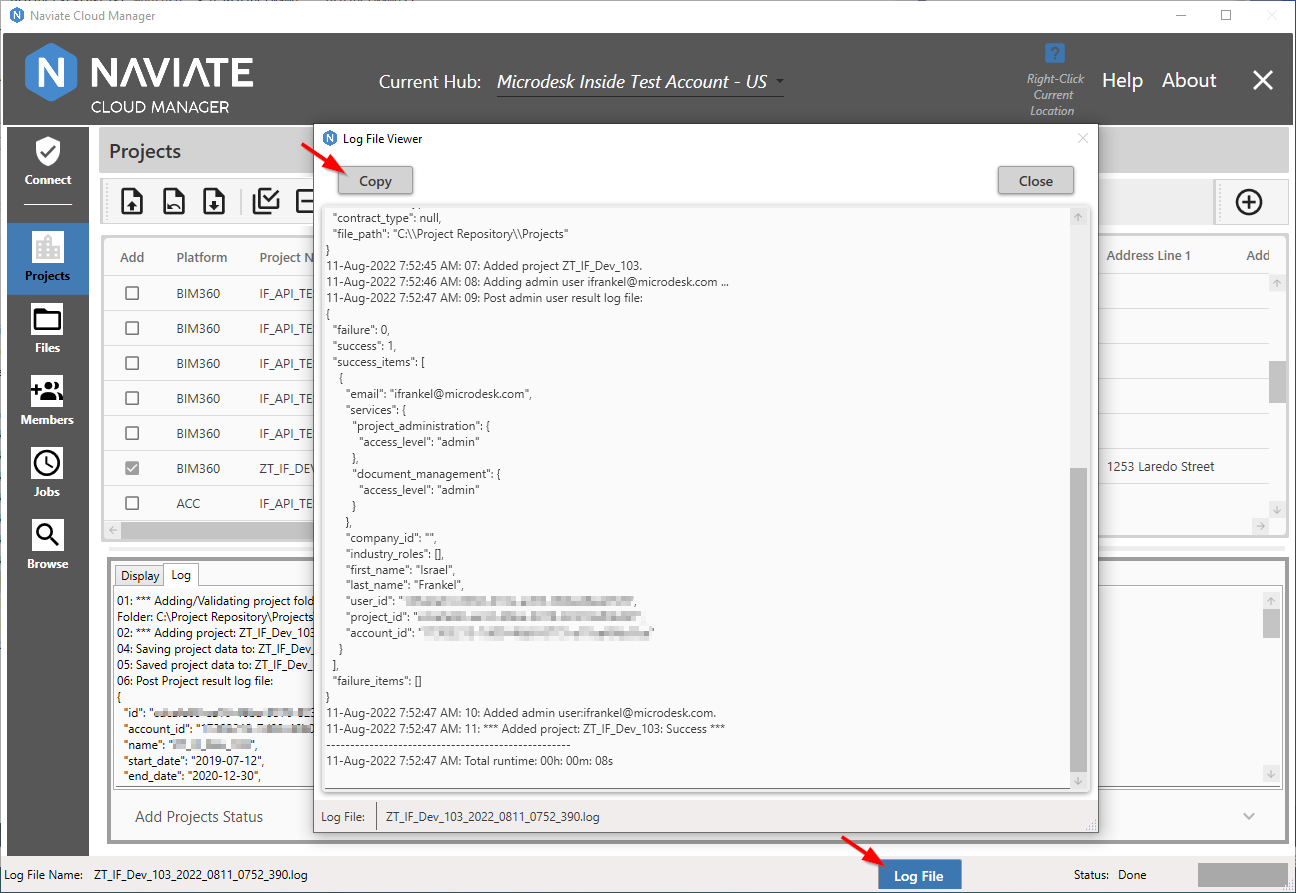
Also, please note on the preceding Add Project result screen the log file name at the lower left corner of the window. All system log files are stored as text files on disk and are available at any time. By default, this location is C:\ProgramData\Microdesk\BIMrx.CloudManager\Logs with the following module-specific sub-directories:
- Startup (logs generated when turned on via the settings file or in case of errors that occur on startup)
- Projects
- Files
- Users (stores files for members operations)
- Jobs