Data Transfer Conduit
With the help of the DataTransfer Conduits command, the Revit user can easily match common parameters' values within each conduit run.

In Revit:
- In the ribbon, navigate to the NAVIATE tab >> NAVIATE Core panel >> DataTransfer Conduits command:
- Select the start conduit that you want to match with.
- Select the end conduit that you’d like to change parameters values with.
Example of a start conduit and an end conduit:

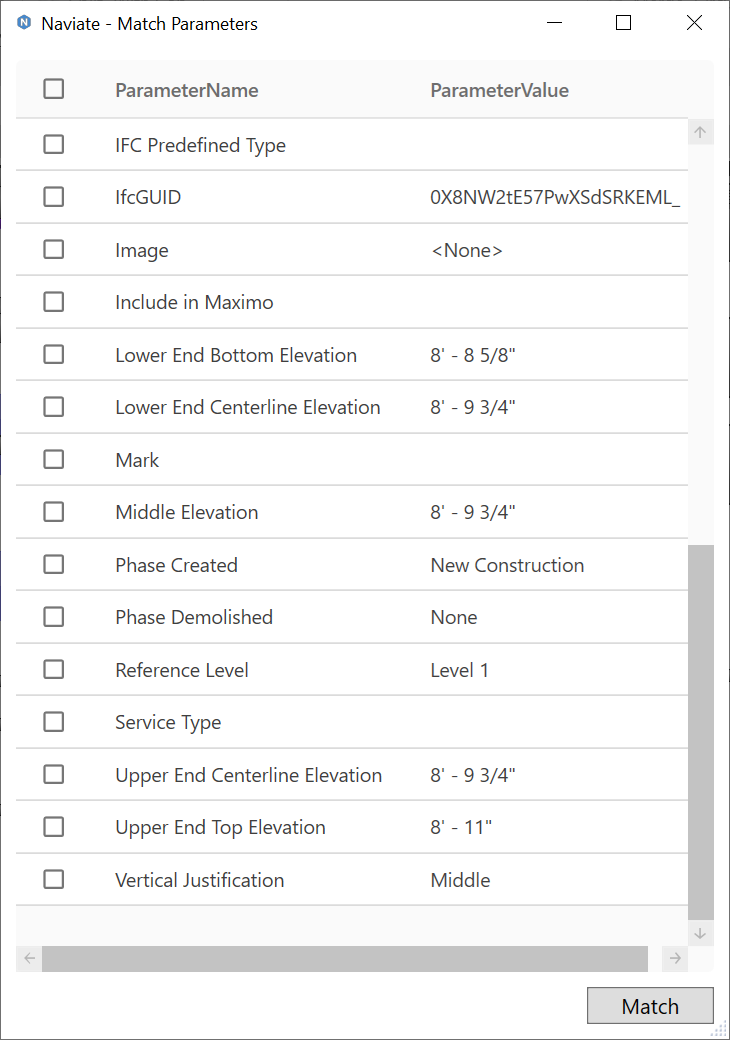
- The Match Parameters dialog box will pop up:

- Check the parameters that you'd like to change.
(You could also check all/uncheck all using the check box on top left corner of the dialog box)
- Click Match button on bottom right corner of the dialog box.
Now, parameters' values from the set of elements(all connected conduits and fitting bettween start and end conuduits including the end conduit) are now matched with the first selected element's(start conduit) parameters' values.
Match Parameters Dialog Interface:
- Only conduit and conduit fitting can be selected with DataTransfer Conduits command.
- The dialog box only shows all the instance parameters along with their values from the first selected element.
- All parameters are listed with alphabet order.
- If a parameter is not existing in the second selection, it will be automatically ignored even it is checked in the dialog interface.
Notes:
- This feature currently only works with instance parameters.
- After the first time you run this command, it will remember which parameters where previously selected.