Reroute Around
With the help of the Reroute Around command, the Revit user can offset a pipe, duct or conduit to the left or right by a desired offset and connect back to the original at a selected angle between two break points. This command can be used in 3D views.
In Revit:
- In the ribbon, navigate to the BIMrx tab >> BIMrx MEP panel >> Reroute Around command:

- There are 2 selection methods:
- Single selection: Press the Reroute Around command and select a single element
- Multi selection: Select multiple of the same type elements and then press the Reroute Around command
- Select the two break points along the single MEP run. These are the locations the center of the elbows will be placed at.
- Depending on the 1st and 2nd break point clicks, determines the direction of the route around. From the 1st point to the 2nd point will determines the direction and the route direction will always go to the right of that.
This opens the Reroute Around Settings dialog:
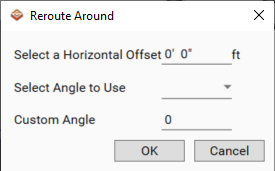
- Define the Vertical Offset for the newly created MEP run. Use a positive value to reroute up, and a negative value to reroute down.
- Define the angle of elbows to be used in the Select Angle to Use drop-down.
- Alternatively set the Custom Angle.
The command splits the element at the selected break points, creates another of the same element in-between the break points at the vertical offset down then reconnects using the angles selected by the user.
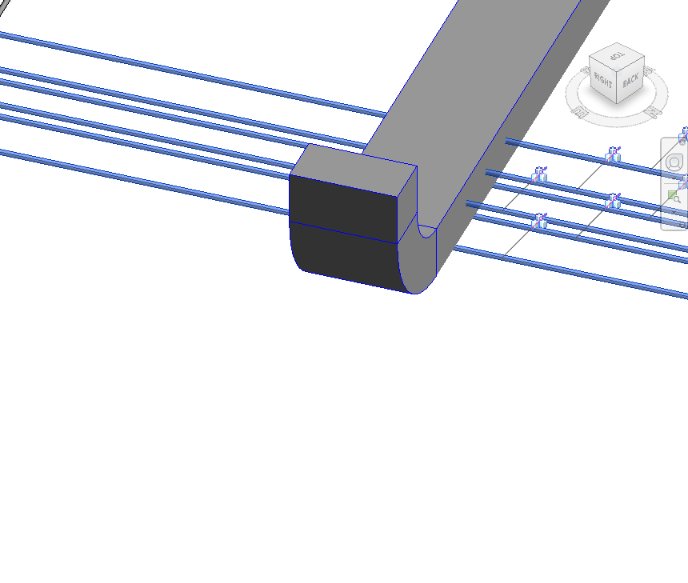
Example before executing command, with an obstructing duct in the way of pipe routing:
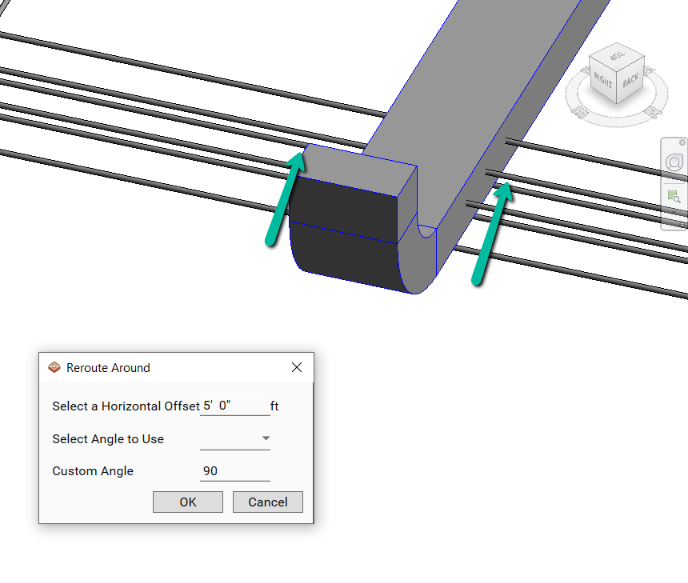
Example of Reroute Around Settings after two locations for split have been clicked along the pipe run (If multiple elements are selected, the inner most element will be break at the selected points and all the others will maintain the offsets from each other):
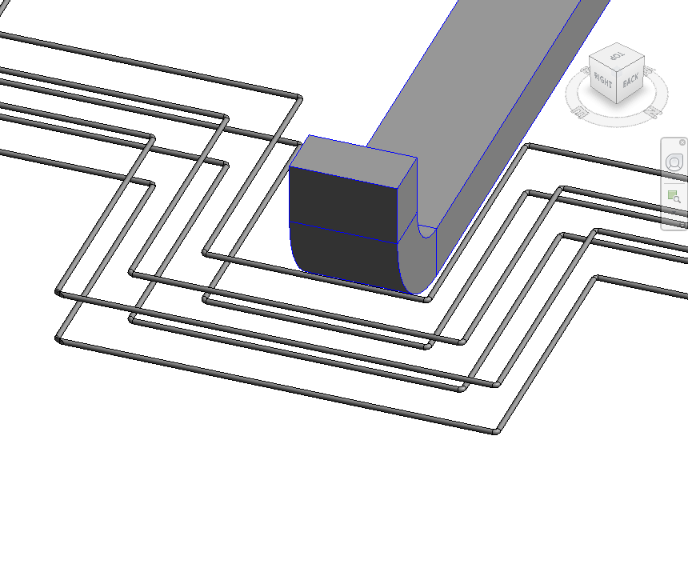
Example result:
Notes:
- The unit of measurement for Length will follow the settings for project units. (i.e. If the project units are in mm the Horizontal Offset will read in mm.)