Kick 90
With the help of the Kick 90 command, the Revit user can connect two round MEP runs together by a 90 degree elbow rotated and connected to a user-specified angle. User can perform a kick 90 on conduit, pipe, or round duct. This command can be used in 2D and 3D views and will work on elements that are not in the same X, Y or Z axis. Elements must be perpendicular and non-co-planer to auto place the appropriate rolling 90.
In Revit:
- In the ribbon, navigate to the BIMrx tab >> BIMrx MEP panel >> Roll Into Conduit command:

This opens the Kick 90 Settings dialog:
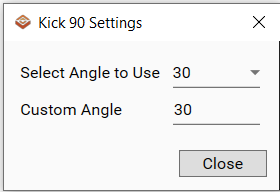
- Select Angle to Use - Select a typical angle from the drop-down. The list shows typical angles:
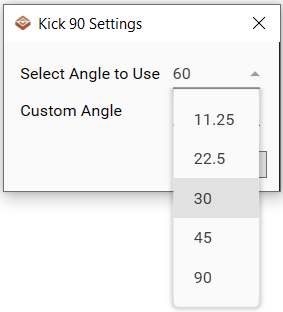
- User also has the option to insert a Custom Angle if the desired angle is not in the drop-down.
- The last set angle will be the default the next time the command is run.
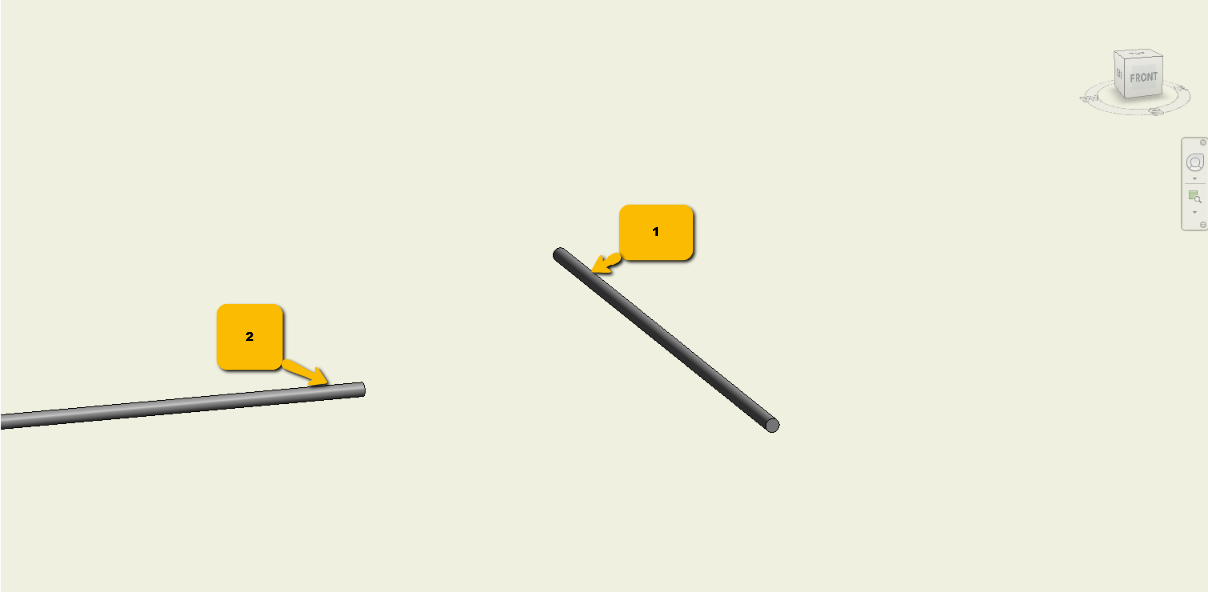
- Select two MEP elements (conduits, pipe, round duct):
- Select a MEP element that will have attached the 90 degree elbow.
- Select a second MEP element to connect into.
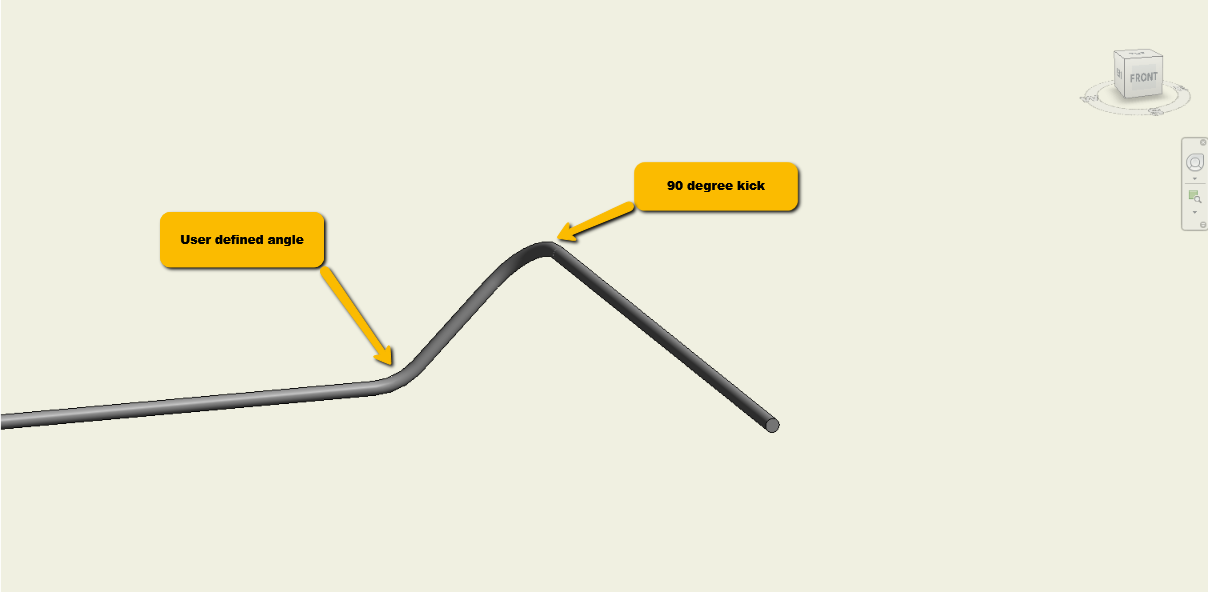
The command will connect the first element to the second element from the first selected element’s end point with a 90 degree elbow and connect to the second selected element at the user-defined angle.
Example of selecting two (2) conduits to define angle:
Example result after applying angle to use:
After completion the command will repetitively prompt user for MEP element selection of 2 elements for creating Kick90 connections. To end command enter "Escape" key or select the "Close" button. Note that if the first element has been selected and you are prompted for the second element, selecting "Escape" key will put you back at the first element selection prompt.