Imprint
With the help of the Imprint command, the Revit user can Create an image of a Word, Excel, or PDF Document. A live link between the newly created Image and Document will make it simple to manage the document and keep it up to date.
In Revit:
- In the ribbon, navigate to the BIMrx tab >> BIMrx Core panel >> Imprint command:

- The main interface will show all the existing imprints and will update their information on open.
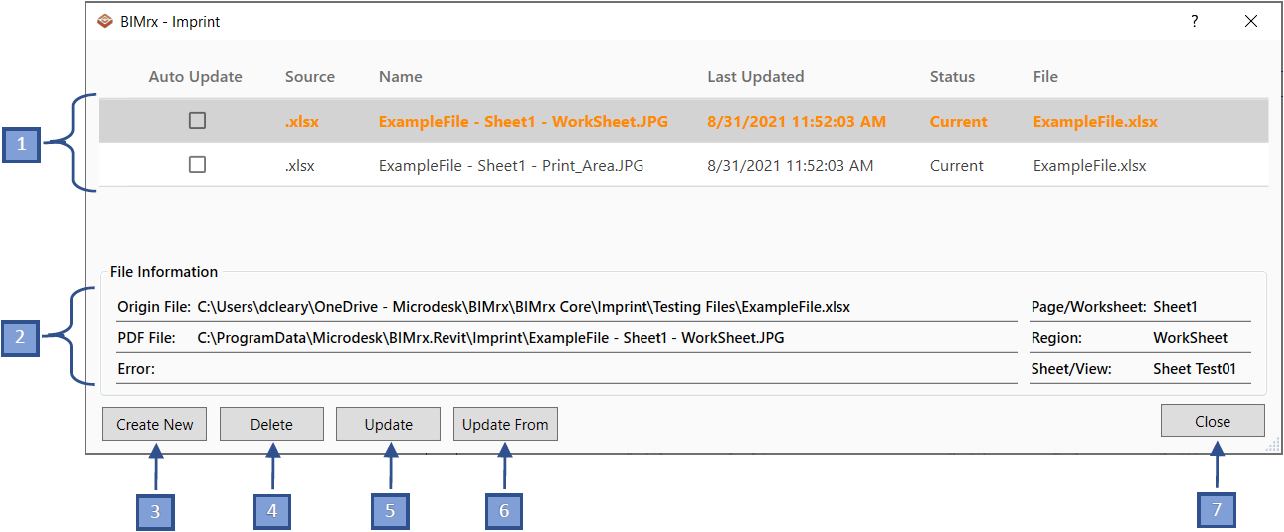
Imprint Dialog interface:
- Existing Imprint Images and it's information. The selected Imprint Image is highlighted in gray with orange text.
- Auto Update: This check box controls how the the Imprint will be updated. If checked the Imprint will automatically update when the Revit file is opened or Imprint Dialog is opened.
- Source: The file type of the source document
- Name: The name of the Image in Revit.
- Last Update: The date that the source file was updated
- Status: Shows a status of the Imprint Image.
- Current: The Imprint Image is up to date with the source file.
- Out-of-date: The Imprint Image is out of date with the source file.
- Error: This means that something is wrong with the Imprint and it's link with the source file. See the Error in the File Information below to read the specific error message.
- File: The name of the source file.
- File Information contains additional detailed information on the currently selected Imprint.
- Create New
- Delete - Delete the currently selected Imprint in the main dialog and all it's images in the Revit project.
- Update - Update the Imprint image from the Source File that the Imprint was created from.
- Imprint will not update if the source file is currently open.
- Update From - Replace the Imprint image with a new Imprint from a new file.
- The user will be able to select one Page or Range in a new file of the users choosing.
- Close - Saves all changes and closes Imprint.